- Published on
Azure SQL Databases - Deploying Updates with EF Core and GitHub
10 min read- Authors

- Name
- Daniel Mackay
- @daniel_mackay

Introduction
Recently, a colleague and I were working on a DB migration process with EF Core on an internal project. The easy option here is to get the application to run DB migrations during start-up. But this adds to start-up time and can cause issues when scaling out to multiple processes. Instead, we wanted to deploy DB schema changes during the CICD GitHub Workflow. This is a good practice in the devops world, as the DB migration only happens once on deployment, and application start-up times and scale-out are not affected.
However, there were a few issues we ran into along the way. This post will cover these issues, and explore several possible solutions.
Thanks to Matt Wicks and Gordon Beaming their helpful input on this problem.
Pre-requisites
To follow along with this post, you will need:
- An Azure SQL Server and Database
- GitHub Repository
- Database Migrations generated by EF Core
Process
The process we should follow for this is:
- Workflow is triggered on push to
main - Build (and ideally Test)
- Generate an EF Core Migration Bundle
- Deploy the Migration Bundle to an Azure SQL Database
- Deploy the Application to Azure (not covered in this article)
Setup
To start I have a simple .NET 8 Web API with a single API to return a list of TodoItems.
The TodoItem class is defined as:
public class TodoItem
{
    public int Id { get; set; }

    public string? Title { get; set; }

    public bool IsComplete { get; set; }

    public DateTime? DueDate { get; set; }
}
And I've generated a migration using the EF Core CLI:
/// <inheritdoc />
public partial class Initial : Migration
{
    /// <inheritdoc />
    protected override void Up(MigrationBuilder migrationBuilder)
    {
        migrationBuilder.CreateTable(
            name: "TodoItems",
            columns: table => new
            {
                Id = table.Column<int>(type: "int", nullable: false)
                    .Annotation("SqlServer:Identity", "1, 1"),
                Title = table.Column<string>(type: "nvarchar(max)", nullable: true),
                IsComplete = table.Column<bool>(type: "bit", nullable: false),
                DueDate = table.Column<DateTime>(type: "datetime2", nullable: true)
            },
            constraints: table =>
            {
                table.PrimaryKey("PK_TodoItems", x => x.Id);
            });
    }

    /// <inheritdoc />
    protected override void Down(MigrationBuilder migrationBuilder)
    {
        migrationBuilder.DropTable(
            name: "TodoItems");
    }
}
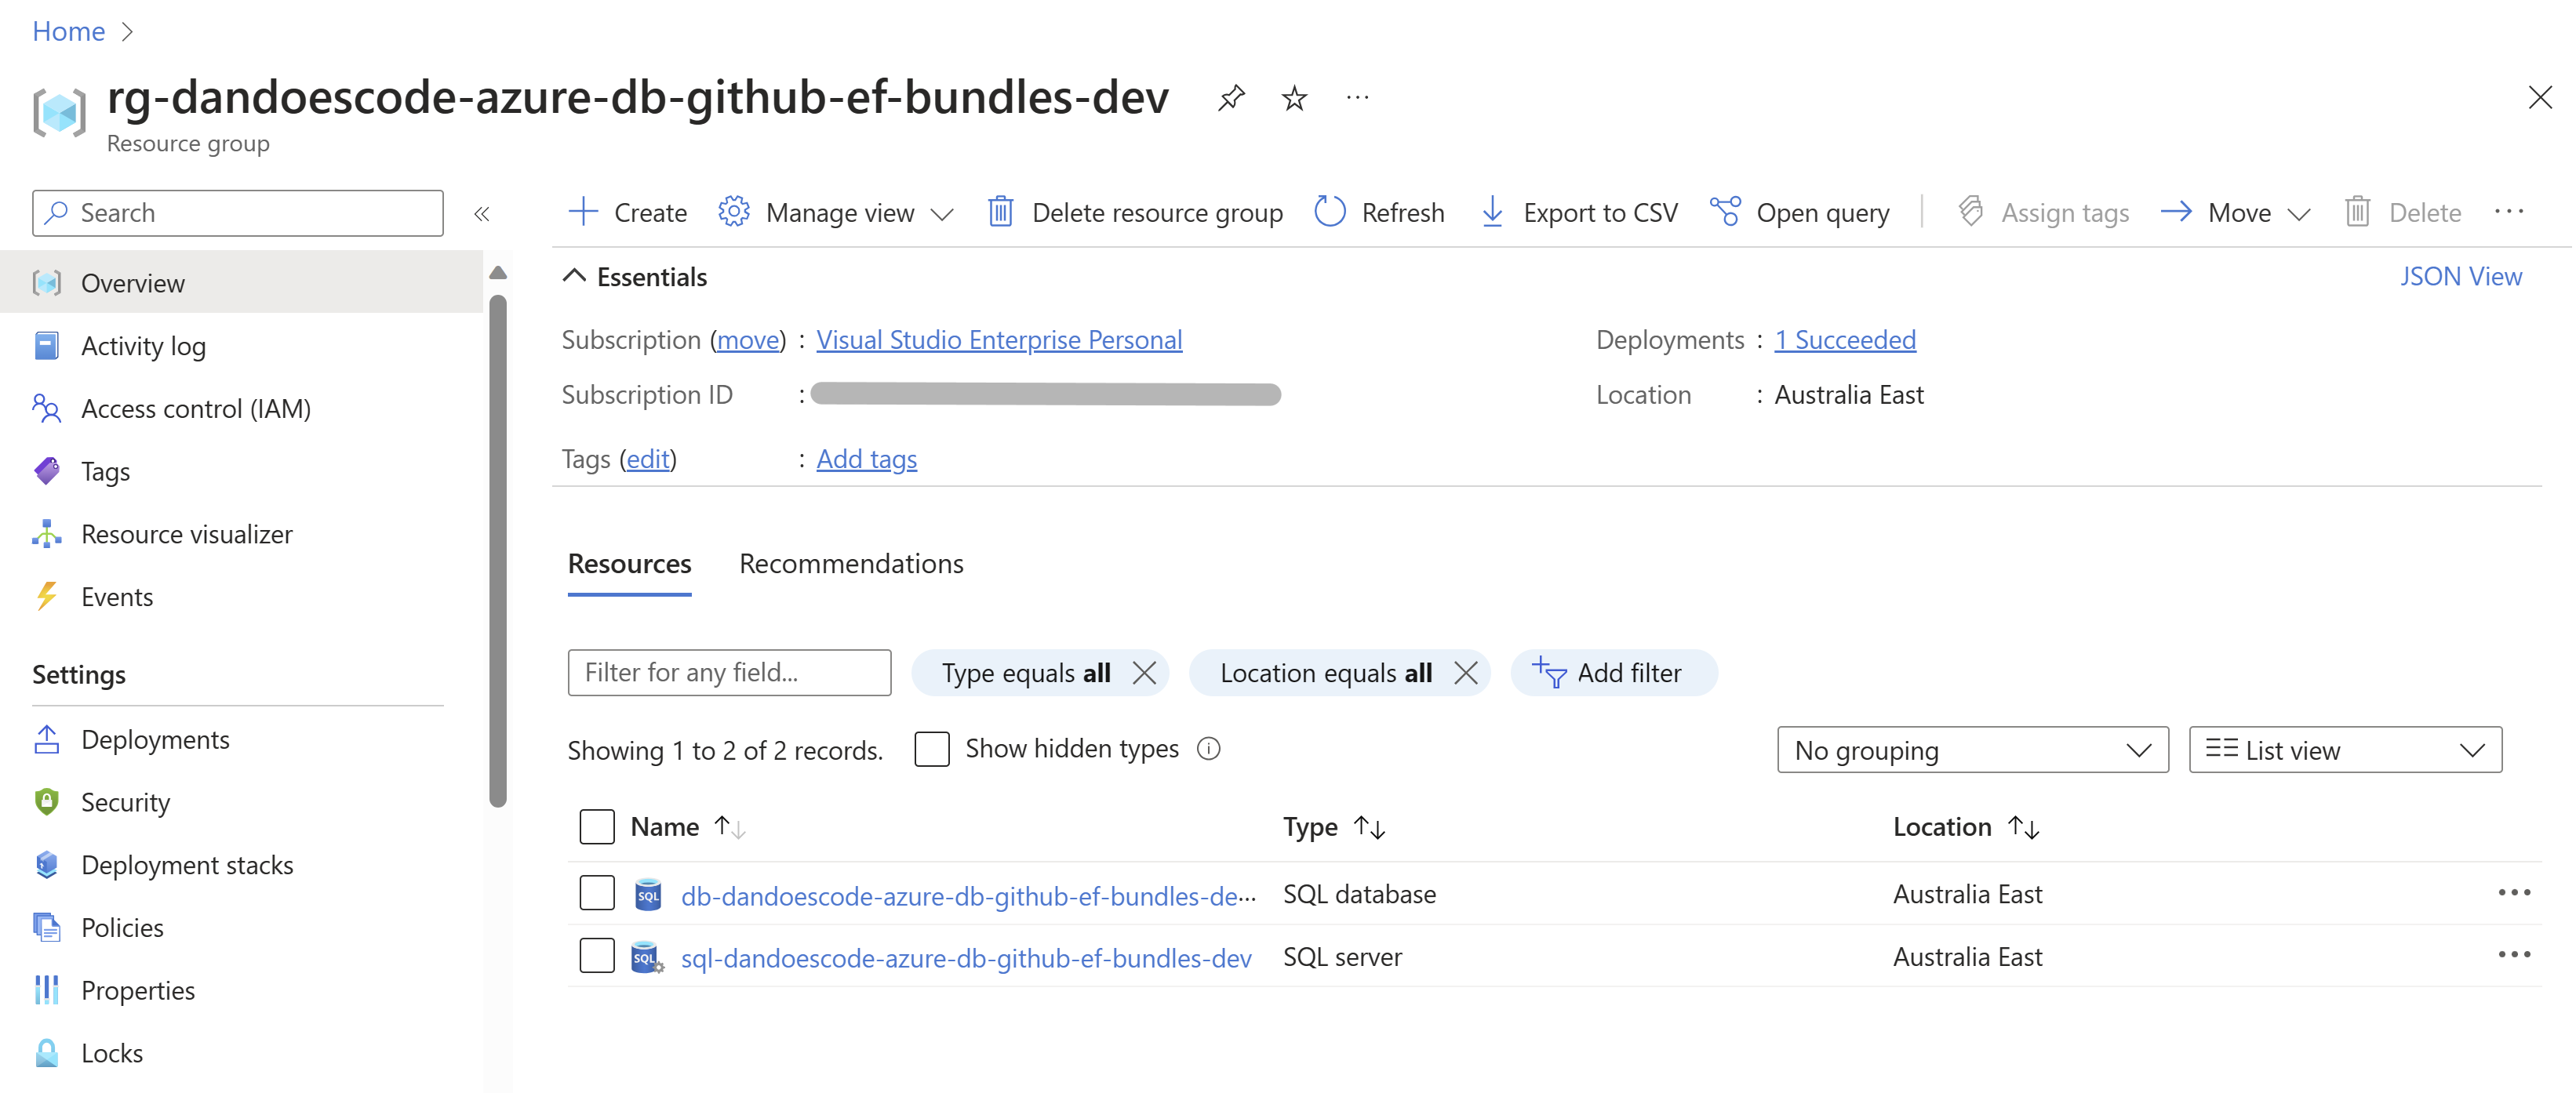
Next, we need an Azure SQL Server and Database. I've created a new Azure SQL Server and Database using the Azure Portal. I've also created a new user and password for the database.
I've also got a basic GitHub Workflow setup that builds the application.
name: .NET

on:
  push:
    branches: [ "main" ]
  pull_request:
    branches: [ "main" ]

jobs:
  build:

    runs-on: ubuntu-latest

    steps:
    - uses: actions/checkout@v3
    - name: Setup .NET
      uses: actions/setup-dotnet@v3
    - name: Restore dependencies
      run: dotnet restore
    - name: Build
      run: dotnet build --no-restore
Challenge
We're now ready to start deploying our database migrations. The first step is to generate a migration bundle. This is a self-contained executable that contains all our migrations. It is the recommended way to deploy migrations to production.
To generate a migration bundle in our GitHub Workflow we can leverage the EF Core CLI:
- name: Restore Tools
  run: dotnet tool restore
- name: Build Bundle
  run: dotnet dotnet-ef migrations bundle --self-contained --force
  working-directory: ./WebApi
- name: Run Migrations
  run: ./efbundle --connection "${CONNECTION_STRING}"
  working-directory: ./WebApi
  env:
    CONNECTION_STRING: ${{ secrets.CONNECTION_STRING }}
Note: In a real-world scenario, after generating the migration bundle you would save this as an artifact and execute separately during your deployment pipeline for each environment. I'll leave this as an exercise for the reader. 😄
In this project I am using a .NET Tool Manifest file. This allows me to specify tool dependencies in my repo and restore these using dotnet tool restore. Because I am using locally installed tools, I need to run dotnet dotnet-ef instead of dotnet ef to execute the EF Core CLI.
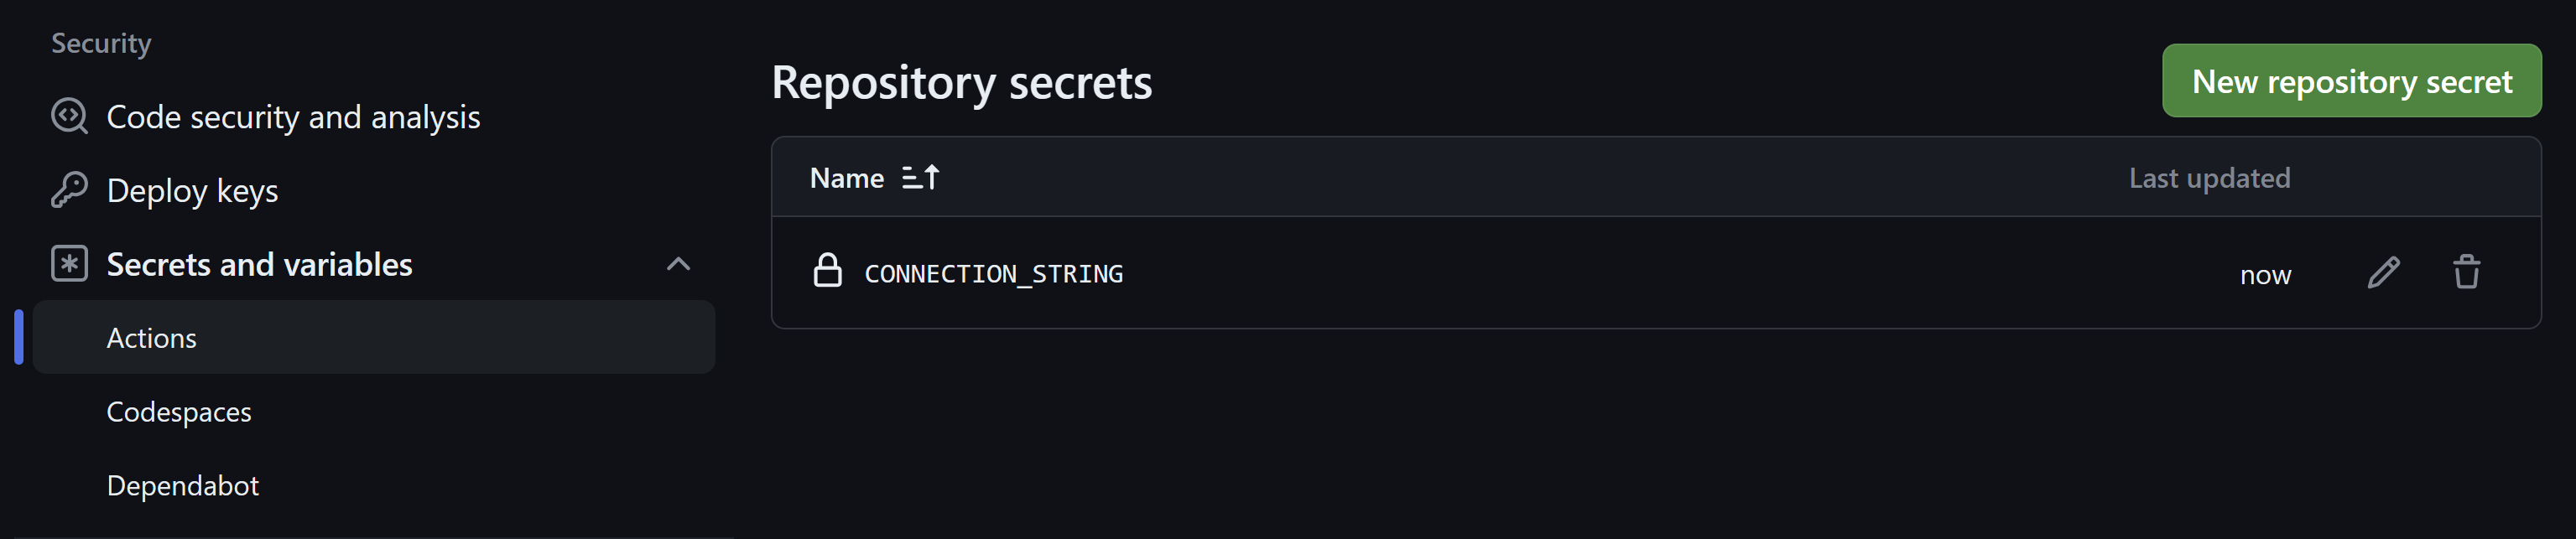
Before we can run this, we need to add the CONNECTION_STRING secret to our GitHub repository. This is done in the repository settings under Secrets.
Now let's try running our workflow and see what happens.
BOOM! 💥
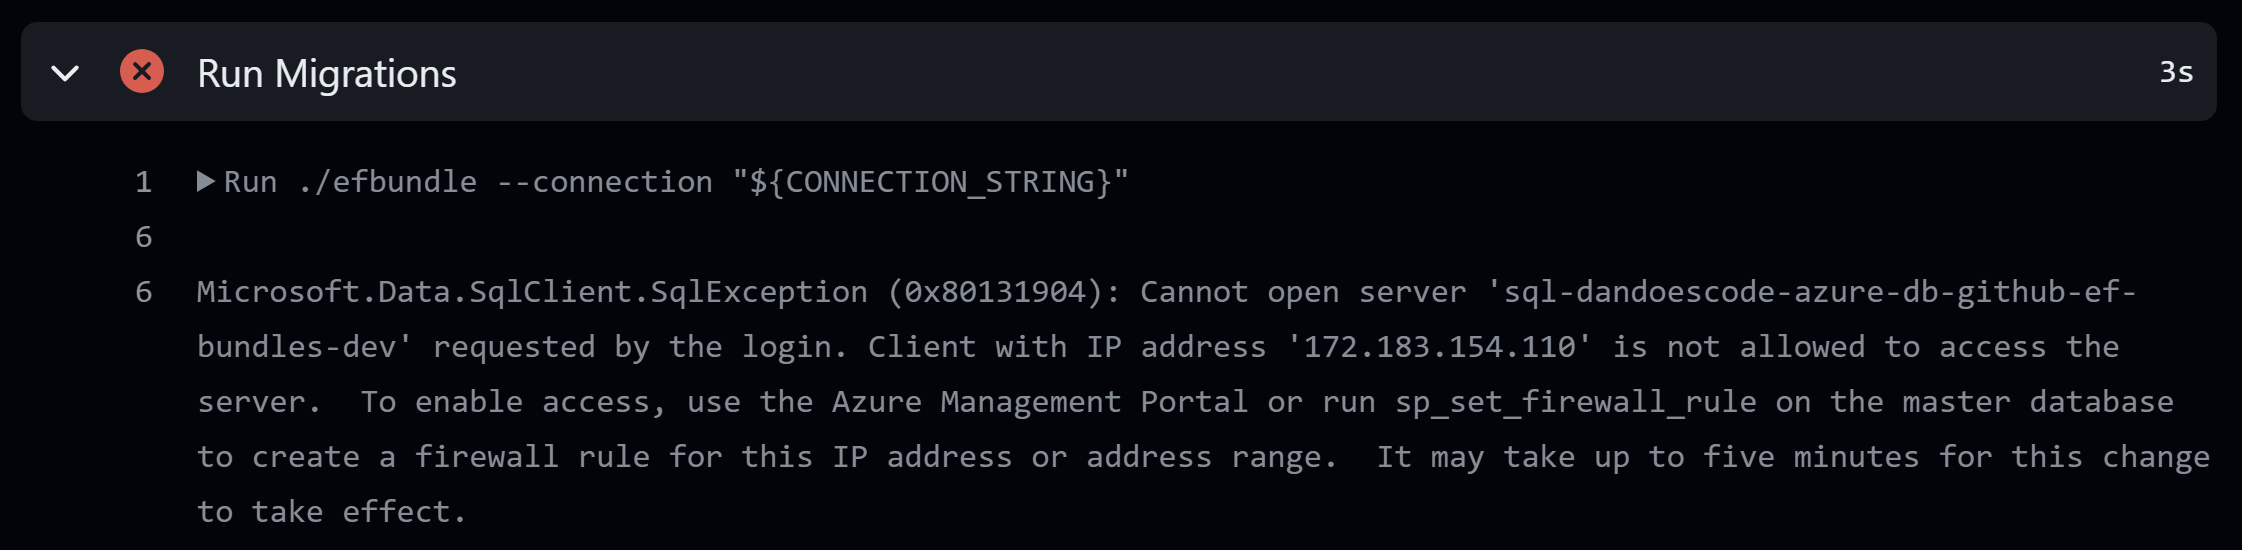
Due to our Azure SQL DB having a firewall, we need to add a rule to allow the GitHub Runner IP address though the firewall. All other IP addresses will be denied access (this is a good thing).
Options
We were so close yet so far! How can we get around the IP address issues? Let's explore a few options.
Option 1 - Manually Update in Azure
The first option is to manually update the firewall in the Azure Portal.

This is a simple process, but not ideal. This might work for a short amount of time, but considering the GitHub Workflow Runners execute on cloud infrastructure, the IP address will change over time. This means we would need to manually update the firewall every time the IP address changes.
Option 2 - Allow All GitHub IPs through the Firewall
OK, so let's try to add all the GitHub IP's to the firewall. GitHub expose all IPs they used via their 'meta' endpoint: https://api.github.com/meta. We can use this to get a list of all the IPs and add them to the firewall.
We could create a PowerShell script that loops through all the IPs and adds them to the firewall. For example:
# Login to Azure
Connect-AzAccount

# Get the GitHub IPs
$response = Invoke-RestMethod -Uri 'https://api.github.com/meta'

# Get the Azure SQL Server
$server = Get-AzSqlServer -ServerName "<serverName>" -ResourceGroupName "<resourceGroupName>"

# Add each IP range to the firewall
foreach ($ip in $response.hooks) {
    $startIP, $endIP = $ip -split '/'
    $ruleName = $startIP -replace '\.', '_'
    New-AzSqlServerFirewallRule -ServerName $server.ServerName -ResourceGroupName $server.ResourceGroupName -FirewallRuleName $ruleName -StartIpAddress $startIP -EndIpAddress $endIP
}
Now in theory, this would work, but there are a few issues:
- ❌ There are 4000 IP ranges in the list! These would take a really long time to add to Azure
- ❌ Ideally we would also clean up these IP ranges after the deployment so that's another really long time we need to wait.
- ❌ The IP addresses could change over time. We can't run this script once off. It would need to be run regularly, and possibly every workflow execution. This would massively slow down our workflows and end up costing us a lot of precious build minutes (i.e. money 🤑).
- ❌ Leaves the database open to all GitHub IPs, which poses a security risk.
Option 3 - Inspect Workflow Runner and Add the Current IP Address (recommended)
The next option is to inspect the GitHub Workflow Runner and dynamically add the IP address to the firewall. This is similar to the previous option, but instead of adding all the IP addresses, we only add the IP address of the current runner. This also makes it easier to clean up the firewall rules after the deployment. Let's give it a try.
We can find out the IP address of the current runner by using the public-ip action, and verify the IP by printing it out in the workflow:
- name: Get Public IP
  id: ip
  uses: haythem/public-ip@v1.3
- name: Print Public IP
  run: |
    echo ${{ steps.ip.outputs.ipv4 }}
    echo ${{ steps.ip.outputs.ipv6 }}
Before we can add the IP address to the firewall, we need to login to Azure. We COULD login with our own Azure credentials, but applying the principle of least privilege, we should create a new service principal with the minimum permissions required. We can do this as follows:
# Login to Azure CLI
az login

# Create a service principal (save the AppID and Password)
az ad sp create-for-rbac --name GitHubWorkflow

$appId = "<App ID From Above>"

# Assign the service principal the necessary permissions to manage SQL server firewall rules
az role assignment create --assignee $appID --role "SQL Security Manager"
NOTE: If you have multiple subscriptions ensure you are logging into the correct subscription before creating the service principal.
Then we have to update our workflow to login to Azure using the service principal:
    - name: Login to Azure
      uses: azure/login@v1.6.1
      with:
        creds: ${{ secrets.AZURE_CREDENTIALS }}
For this to work we need to add a new secret to our repository with the service principal credentials. This will be in the format of:
{
  "clientId": "<App ID>",
  "clientSecret": "<Password>",
  "subscriptionId": "<Subscription ID>",
  "tenantId": "<Tenant ID>"
}
NOTE: I'm using service princples + client secrets here due to it being easier to setup. However, the recommended approach is to use OpenID Instead.
When finished you will now have two secrets in your repository.

Now that we have our service principle and can login, we can add the firewall rule. This can be done via:
- name: Add IP to Firewall
  run: az sql server firewall-rule create --resource-group ${RESOURCE_GROUP} --server ${SQL_SERVER} --name GitHubIP --start-ip-address ${IP_ADDRESS} --end-ip-address ${IP_ADDRESS}
  env:
    SQL_SERVER: <Your SQL Server>
    IP_ADDRESS: ${{ steps.ip.outputs.ipv4 }}
    RESOURCE_GROUP: <Your Resource Group>
And of course, to be a good citizen, we should clean up the firewall rule after the deployment:
- name: Remove IP from Firewall
  if: always()
  run: az sql server firewall-rule delete --resource-group ${RESOURCE_GROUP} --server ${SQL_SERVER} --name GitHubIP
  env:
    SQL_SERVER: <Your SQL Server>
    RESOURCE_GROUP: <Your Resource Group>
Above we are using the if: always() condition to ensure the step is always executed, even if the previous steps fail. This is important as we want to ensure the firewall rule is always removed after the deployment.
With all these changes in place the complete workflow looks like:
name: .NET

on:
  push:
    branches: [ "main" ]
  pull_request:
    branches: [ "main" ]

jobs:
  build:

    runs-on: ubuntu-latest

    steps:
    - uses: actions/checkout@v3
    - name: Setup .NET
      uses: actions/setup-dotnet@v3
    - name: Restore dependencies
      run: dotnet restore
    - name: Build
      run: dotnet build --no-restore
    - name: Restore Tools
      run: dotnet tool restore
    - name: Build Bundle
      run: dotnet dotnet-ef migrations bundle --self-contained --force
      working-directory: ./WebApi
    - name: Get Public IP
      id: ip
      uses: haythem/public-ip@v1.3
    - name: Print Public IP
      run: |
        echo ${{ steps.ip.outputs.ipv4 }}
        echo ${{ steps.ip.outputs.ipv6 }}
    - name: Login to Azure
      uses: azure/login@v1.6.1
      with:
        creds: ${{ secrets.AZURE_CREDENTIALS }}
    - name: Add IP to Firewall
      run: az sql server firewall-rule create --resource-group ${RESOURCE_GROUP} --server ${SQL_SERVER} --name GitHubIP --start-ip-address ${IP_ADDRESS} --end-ip-address ${IP_ADDRESS}
      env:
        SQL_SERVER: sql-dandoescode-azure-db-github-ef-bundles-dev
        IP_ADDRESS: ${{ steps.ip.outputs.ipv4 }}
        RESOURCE_GROUP: rg-dandoescode-azure-db-github-ef-bundles-dev
    - name: Run Migrations
      run: ./efbundle --connection "${CONNECTION_STRING}"
      working-directory: ./WebApi
      env:
        CONNECTION_STRING: ${{ secrets.CONNECTION_STRING }}
    - name: Remove IP from Firewall
      run: az sql server firewall-rule delete --resource-group ${RESOURCE_GROUP} --server ${SQL_SERVER} --name GitHubIP
      env:
        SQL_SERVER: sql-dandoescode-azure-db-github-ef-bundles-dev
        RESOURCE_GROUP: rg-dandoescode-azure-db-github-ef-bundles-dev
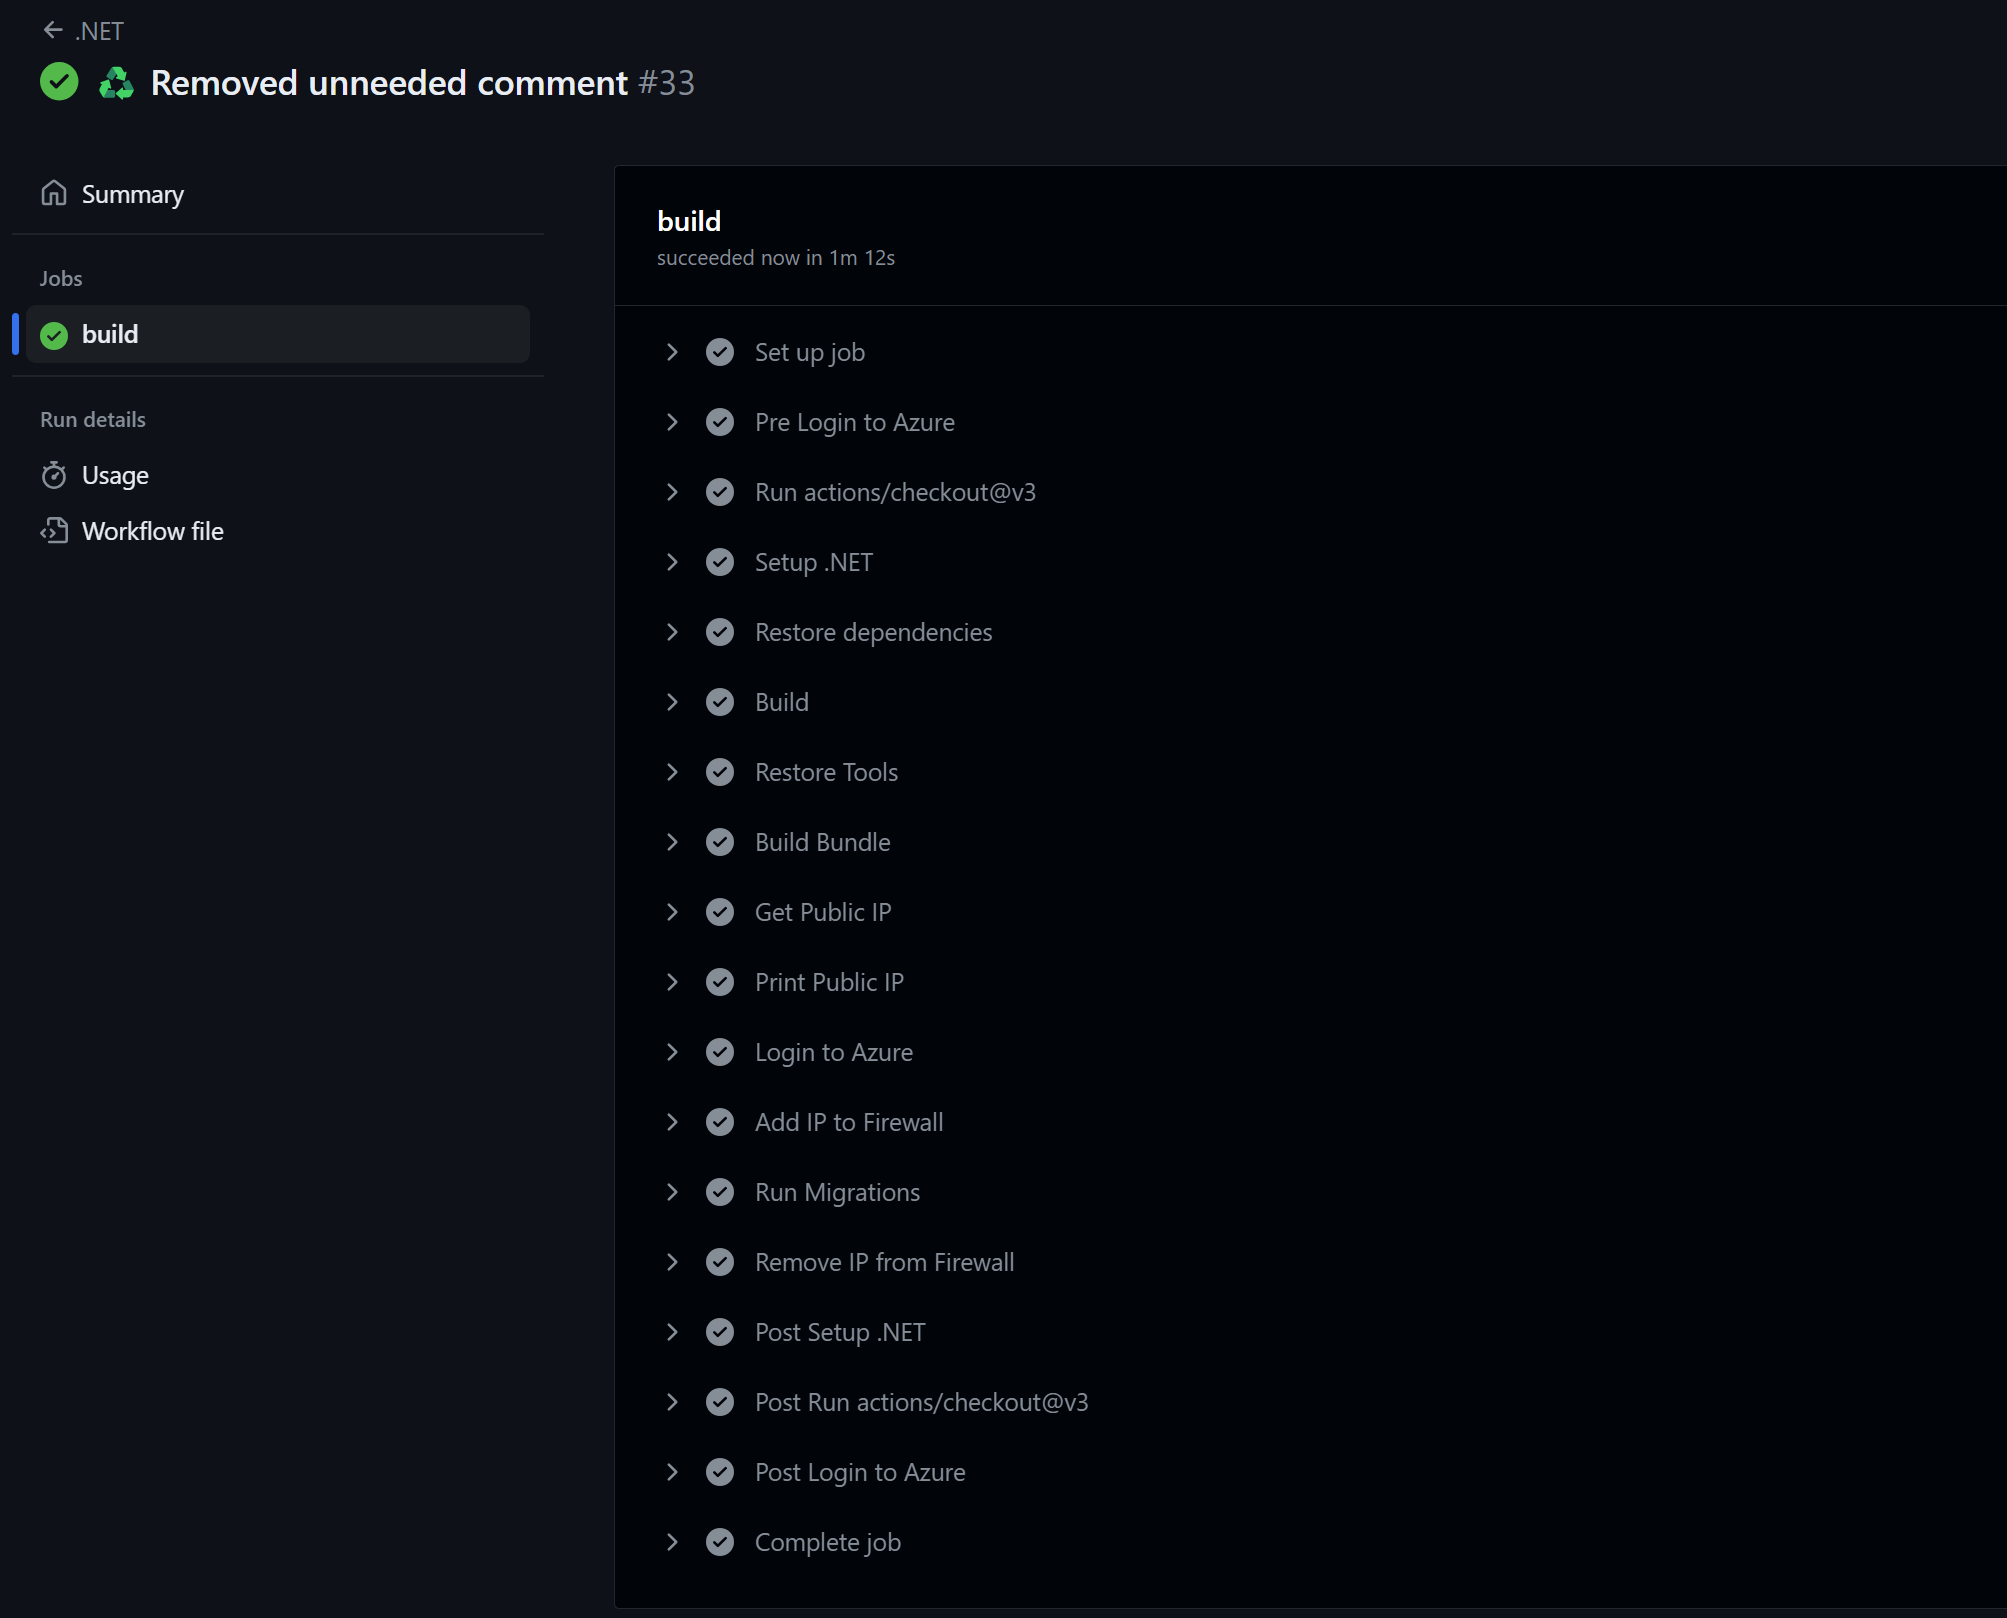
And if we take a look at GitHub, we can see our workflow running successfully! 🥳
Source Code
If you'd like to see the full solution used in the post, you can find it on GitHub: github.com/danielmackay/dandoescode-azure-db-github-ef-bundles
Summary
In this blog post, we've looked at the challenge of whitelisting IP addresses when executing EF Core Migration Bundles from a GitHub Workflow. We looked at several options and explored the pros and cons of each. We landed on our recommended option of inspecting the GitHub Workflow Runner and dynamically adding the IP address to the firewall and removing it again after the deployment. We also looked at how to set this up in a secure way by creating a service principal with the minimum permissions required.
I hope this information helps you in your journey to deploying EF Core Migration Bundles from GitHub Workflows. If you have any questions or comments, please leave them below.