- Published on
Bit Bucket Pipelines - Part 1: Building and Testing ASP.NET Core
6 min read- Authors

- Name
- Daniel Mackay
- @daniel_mackay

Series
- Part 1: Building and Testing ASP.NET Core
- Part 2: Deploying ASP.NET Core to Azure Web App
- Part 3: Deploying a React App to Azure Blob Storage
- Part 4: Deploying a Function App to Azure with Bicep
Intro
Bit Bucket pipelines is a hosted CI/CD platform that allows you to build, test, and deploy your code without the pain of having to manage your own build servers. All builds are done within a docker image on Linux. You can use the default image, but most of the time you will be specifying your own docker image depending on your build needs. Lets dive in.
Pipeline Basics
You start by creating a bitbucket-pipelines.yml file in the root of your project. You can do this manually within your favourite editor, but I find it easier to do this online with Bit Bucket as it will help you to scaffold out this file based on the type of code in your repo. This file has the following structure:
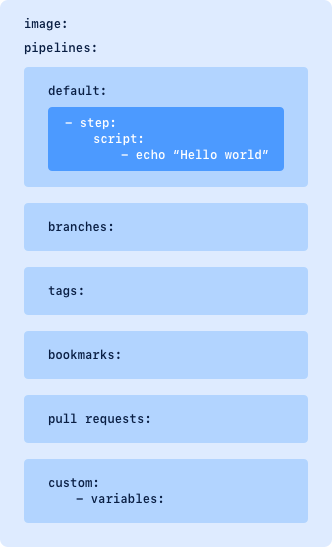 Source: Atlassian
First we have the image. This is the docker image that will be used for your build. For .NET Core we will use microsoft/dotnet:sdk. For a javascript project we would use node:10.15.3.
Next we have the pipelines. Each pipeline will consist of one or more step sections. Each step will be run within a clean image. Initially it might seem like a good idea to have a separate step for every task you need your pipeline to do, but bear in mind that there is an overhead with having to instantiate the docker image for every step. This means that you can chew through a lot of the precious bit bucket minutes in your allowance if you're not careful.
By default each step will use the image specified at the top of your YAML file, but you can even use different build images for different steps. For example, you might have a repo consisting of both ASP.NET Core and React. You could use a dotnet image for the website, and a node image for React all within the same YAML file.
The pipelines can be triggered in different ways by using sections. The simplest is to have a default section, which will trigger on every push for all branches that don't match a pipeline definition in other sections. For more control, you might like to use a branches section to have different steps on develop vs master. You might also like to use tags to control the flow of your pipeline. Considering you only get a limited number of build minutes, instead of building on each commit, you might want to reduce this by only building pull requests via the pull-request section.
Building
Let's create a website, that bit bucket will build on every commit.
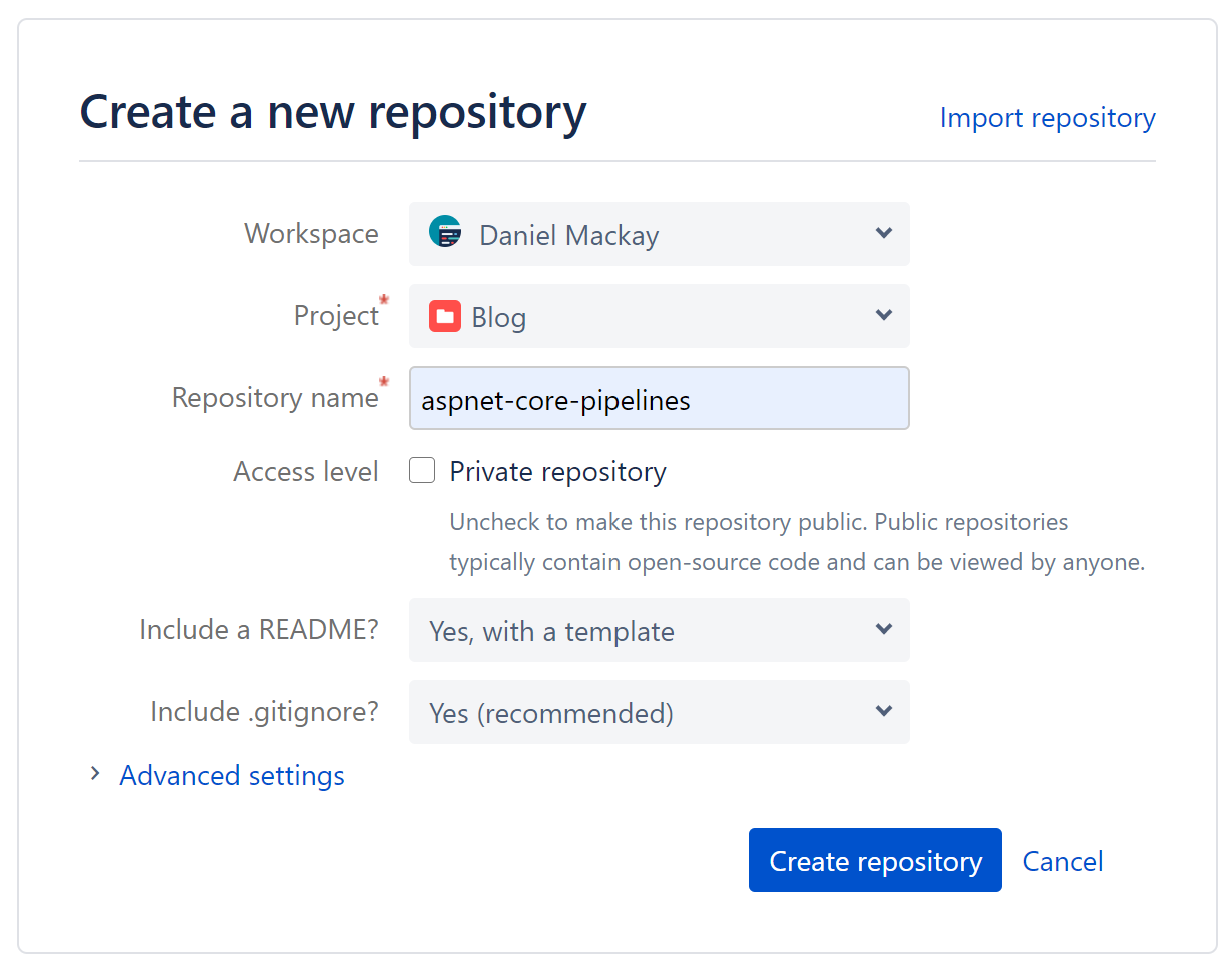
First we will start by creating a repo in Bit Bucket and cloning it.
Then we will clone the repo to our machine:
git clone git@bitbucket.org:<your username>/aspnet-core-pipelines.git
Next, let's create a basic razor page web app.
mkdir aspnet-core-pipelines
cd aspnet-core-pipelines
dotnet new solution
dotnet new webapp --name web
dotnet sln add .\web\
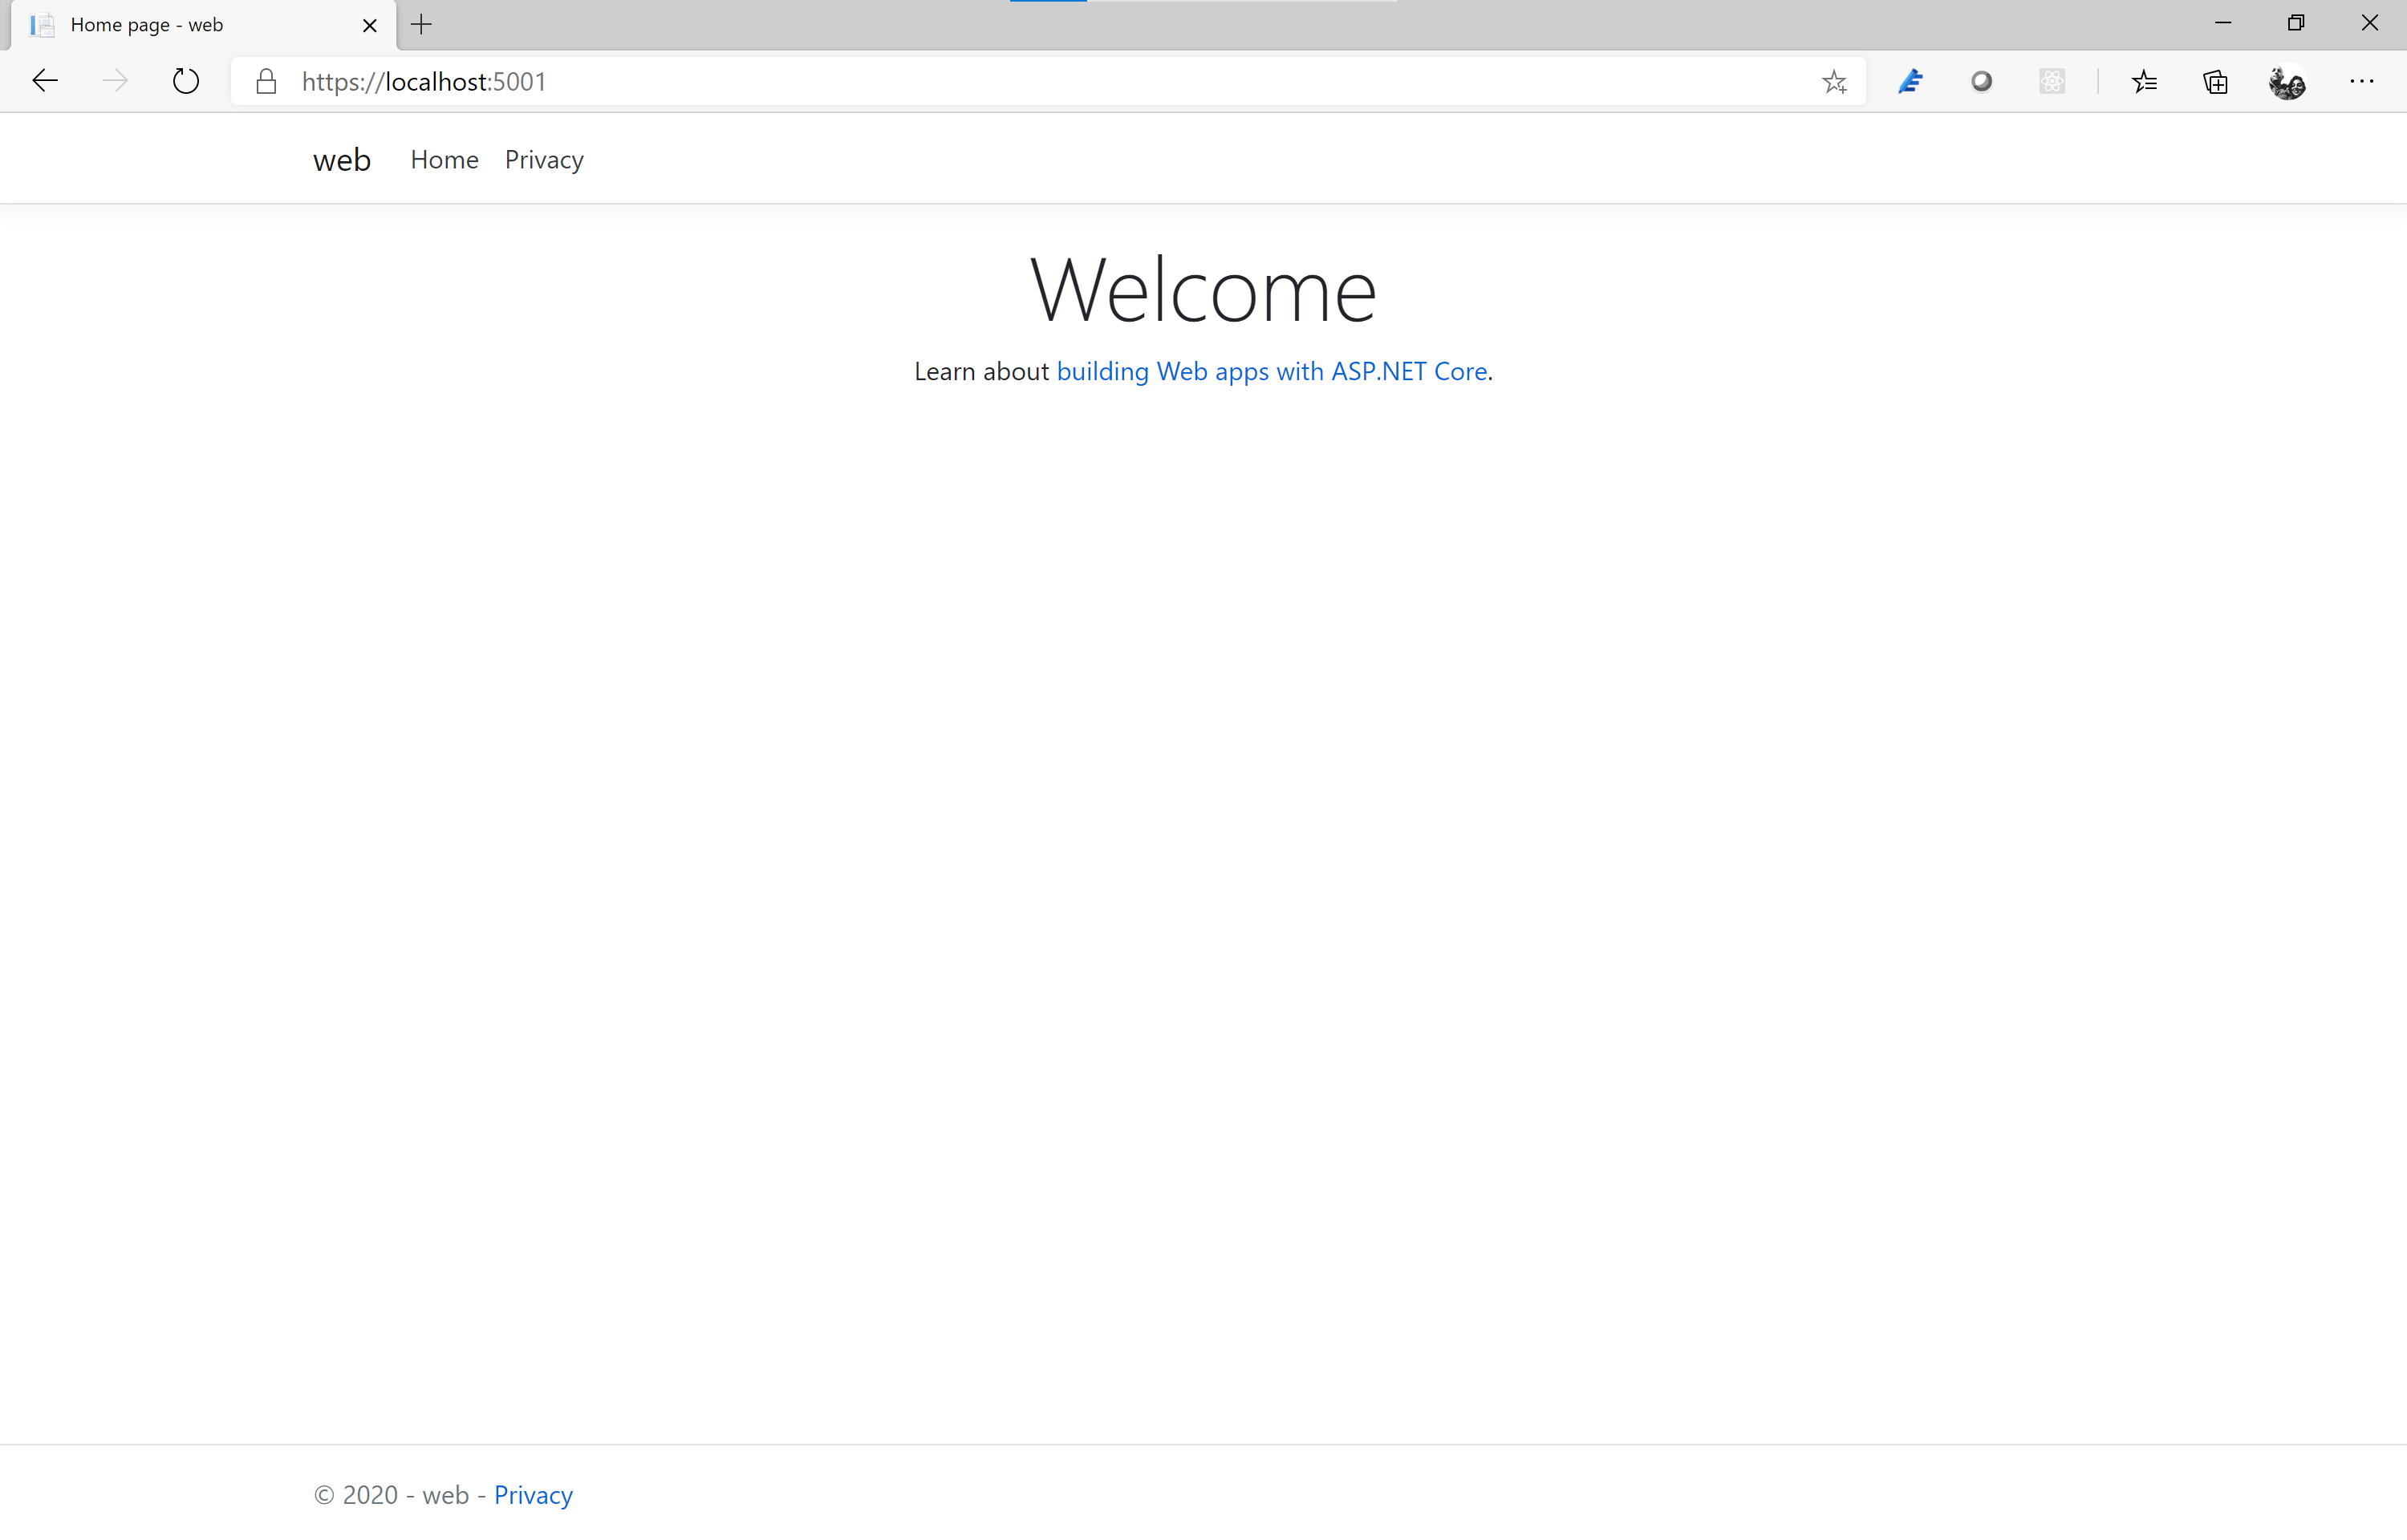
At this stage we have a basic website that we can run:
cd web
dotnet run
Razor page website:
Push the code to Bit Bucket, and let's create our first pipeline:
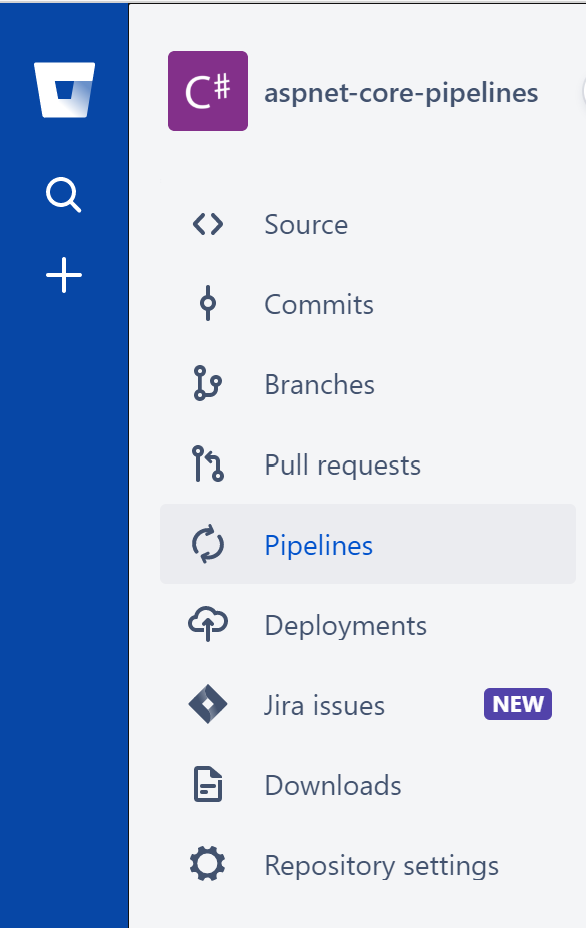
Choose the .NET Core template to get us started, then we will simplify it so that we end up with the following:
image: mcr.microsoft.com/dotnet/core/sdk:3.1

pipelines:
  default:
    - step:
        caches:
          - dotnetcore
        script:
          - dotnet restore
          - dotnet build
NOTE: The default image can't build .NET Core 3.1 projects, so we need to override it to the image shown above
And voila! Our first successful build using pipelines!
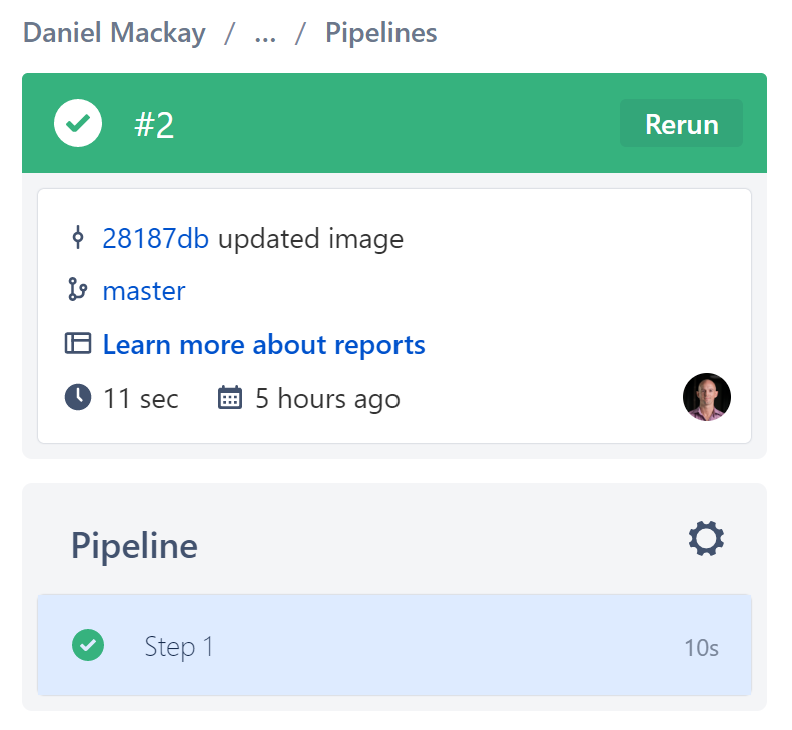
On the right-hand side we can see the details of the build and download the logs if needed.
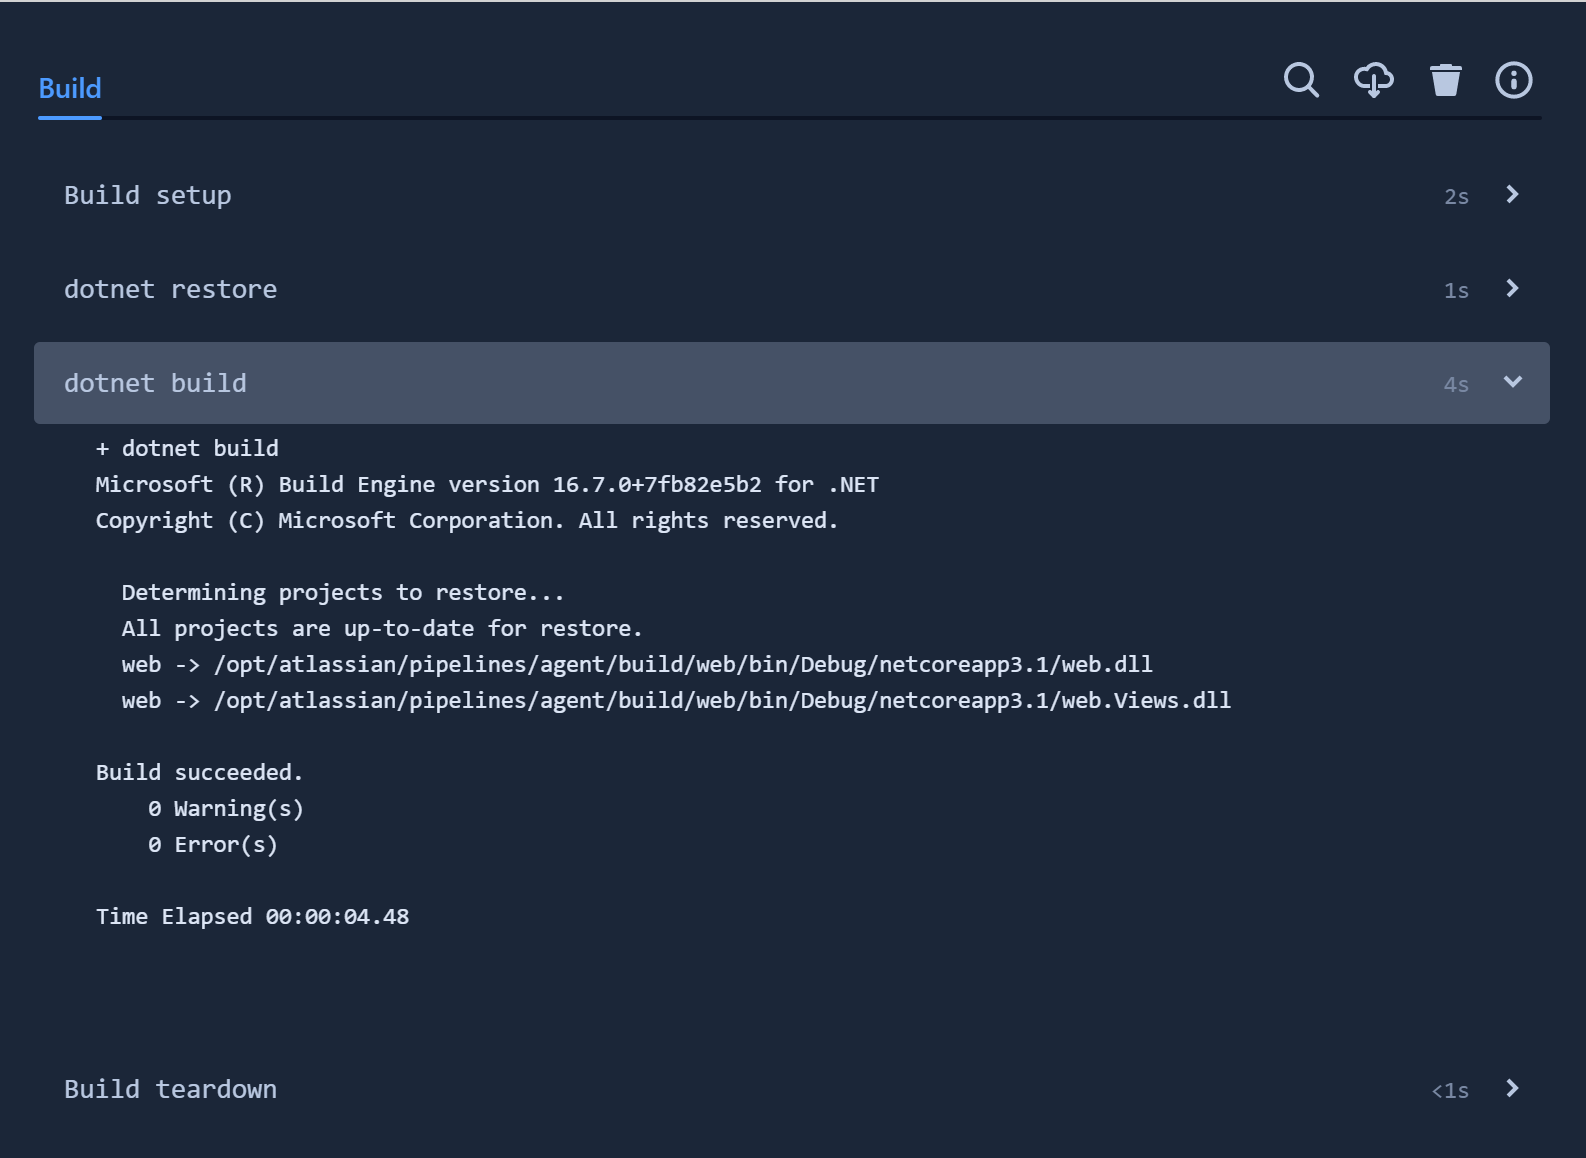
Our build is simple, yet effective. As we are building from the root of the repo, we are building the whole solution. If we had multiple projects and wanted to build one specifically we could so so via the following:
dotnet build ./web
We don't need to specify the .csproj file explicitly, as the dotnet CLI will use the first one it finds in the directory.
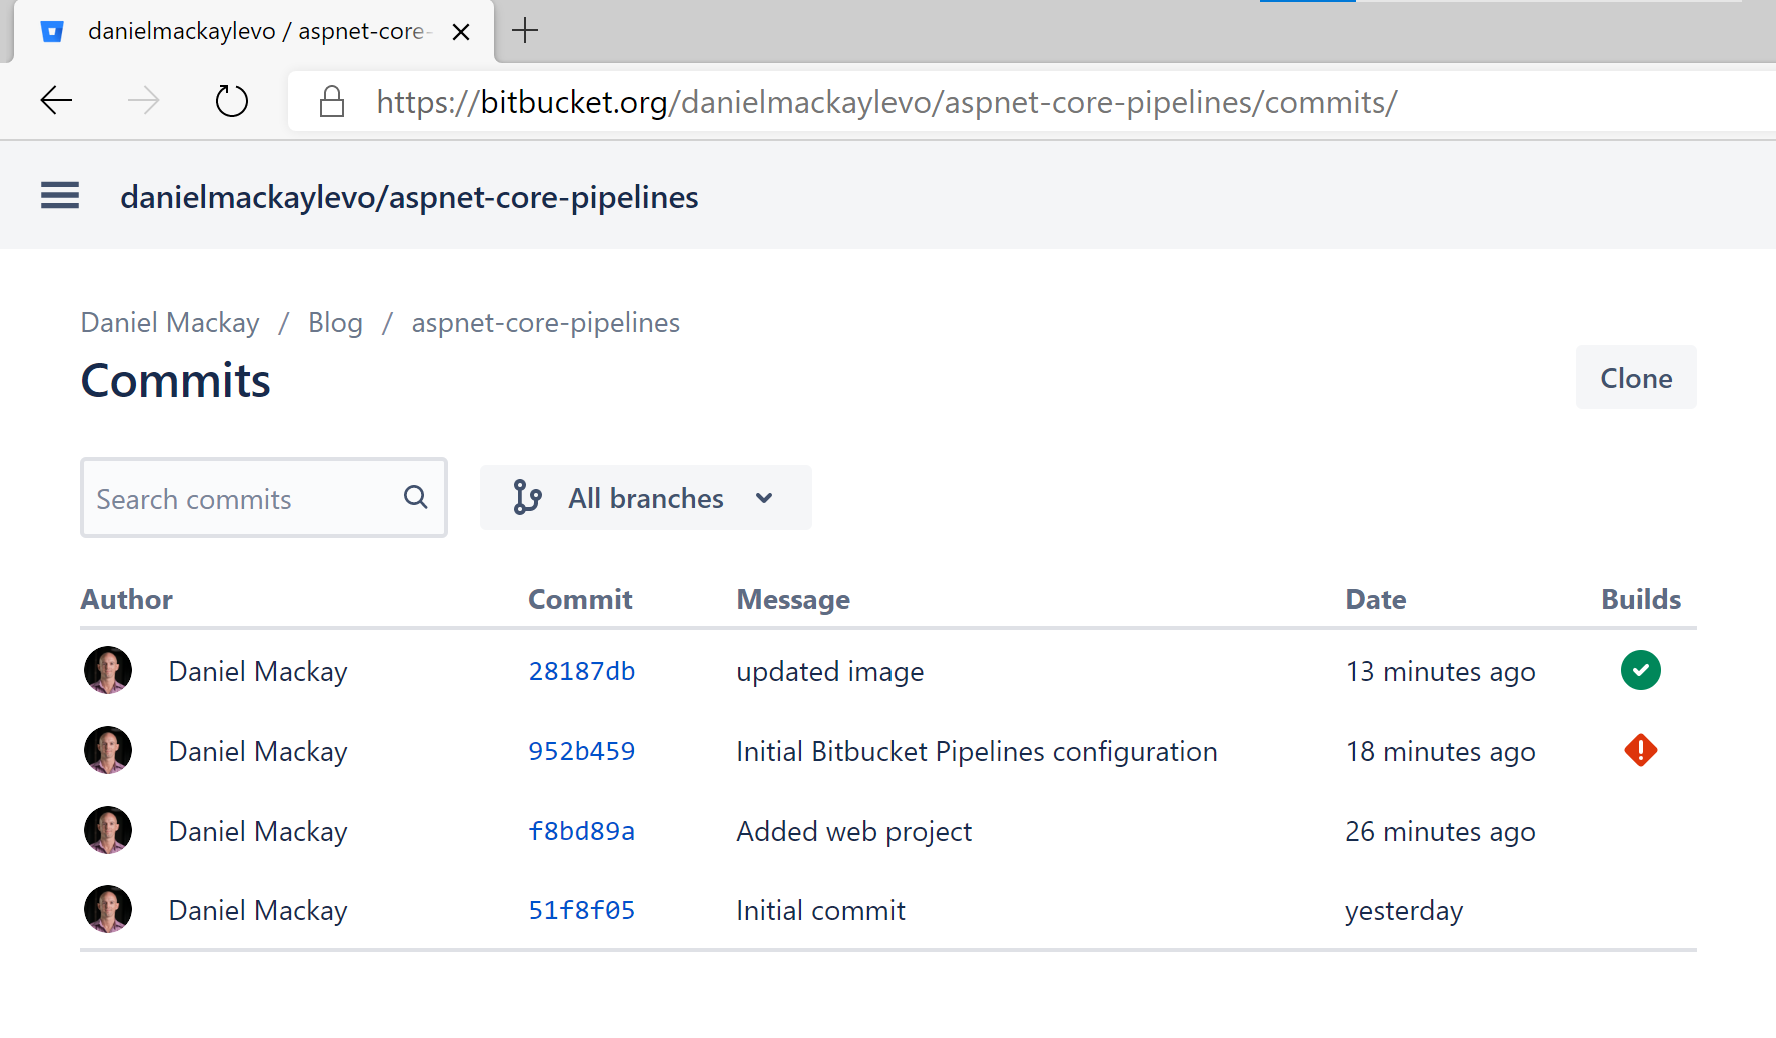
Because pipelines is part of bit bucket, it integrates very nicely throughout the site. We have visibility of the build status for every commit:
And also for every branch in the repo:

Likewise, we would see something similar for any pull requests that have been raised.
Testing
Now that we have a build running on every commit. First lets add some tests to our solution.
mkdir unit-test
cd unit-test
dotnet new xunit
cd ..
dotnet sln add .\unit-test\
Add the following tests into your test project
public class UnitTest1
{
    [Fact]
    public void Test1()
    {
    }

    [Fact]
    public void Test2()
    {
    }

    [Fact]
    public void Test3()
    {
    }
}
Check that the tests run by running the following from the repo root directory.
dotnet test
Lastly, we will add our test step into pipelines. We'll also add a name to the step so that it is more descriptive.
image: mcr.microsoft.com/dotnet/core/sdk:3.1

pipelines:
  default:
    - step:
        name: Build and Test
        caches:
          - dotnetcore
        script:
          - dotnet restore
          - dotnet build
          - dotnet test
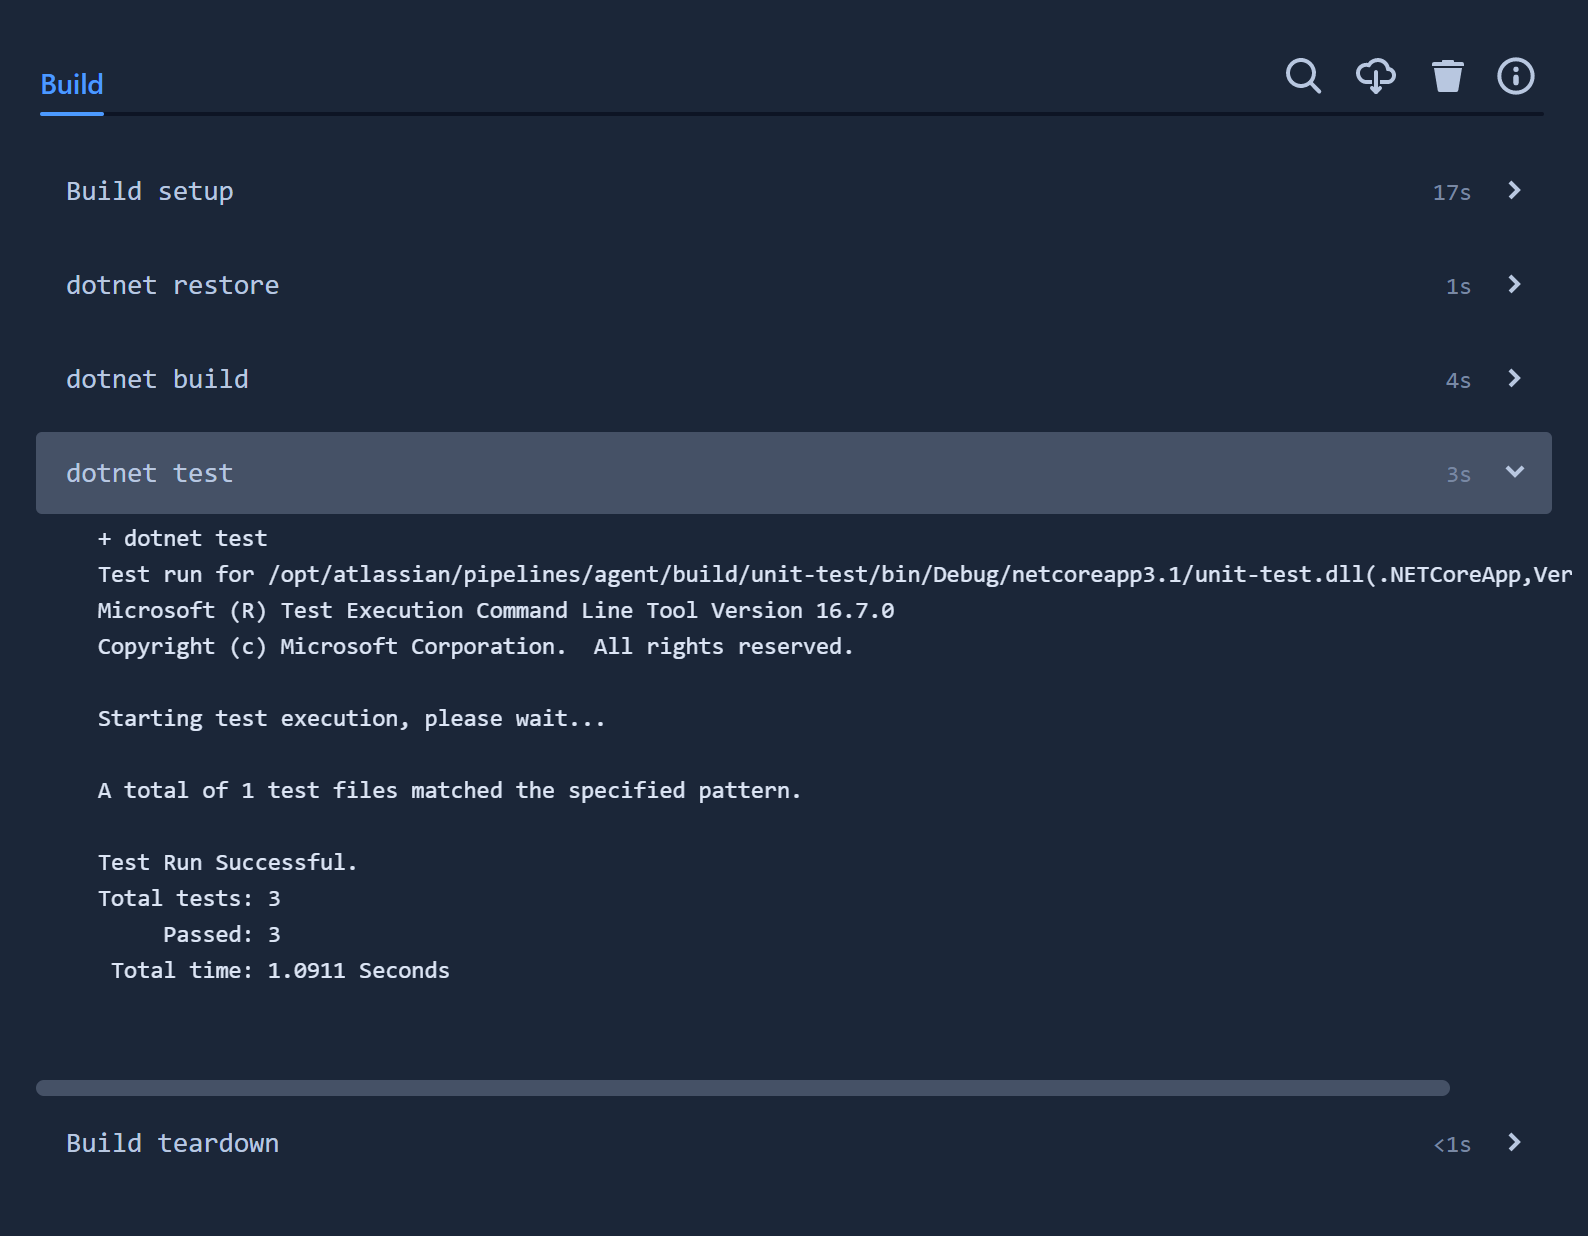
Too easy! Now if we push our code we will see the tests being run by pipelines.

And in the details pane we can see that all 3 of our tests have passed
Summary
After completing the above we now have a Bit Bucket Continuous Integration Pipeline that builds and tests our .NET Core application on every commit. We've seen how to change the docker image based on the type of code we're building. And also how to trigger builds based on different conditions like pull requests or specific branches. And best of all we don't have any build servers to manage!
In Part 2, I'll cover how to use Bit Bucket Pipelines to package up a .NET Core application and publish it to Azure.