- Published on
From Manual PBIs to AI-Powered Conversations: Product Backlog Management with GitHub Copilot
12 min read- Authors

- Name
- Daniel Mackay
- @daniel_mackay

- Introduction
- Solution 1: The Full Manual Slog
- Solution 2: My First Prompt and Its Pains
- Solution 3: Automation with the GitHub MCP Server
- Solution 4: The Power of In-Repo Prompt Files
- The "Aha!" Moment: Context + Conversation
- Bonus Round: What About Video?
- Summary
- Resources
Introduction
As a developer, I'm always looking for ways to optimize my workflow. One of the most tedious, yet critical, tasks I face is creating well-defined Product Backlog Items (PBIs) or user stories. It’s a process that demands careful thought to craft a clear description, acceptance criteria, and relevant notes for the development team. For a long time, this was a completely manual process for me, involving a trip to GitHub.com, navigating to the correct repository, and meticulously filling out issue forms. It was slow, repetitive, and frankly, a bit of a drag. 😫
I knew there had to be a better way. I'd been experimenting with GitHub Copilot and wondered if I could leverage it to streamline this process. This post documents my journey from a fully manual workflow to a sophisticated, conversational system for generating PBIs directly from my editor.
Solution 1: The Full Manual Slog
Let's set the scene. My initial process was what you might expect:
- Open a browser.
- Navigate to GitHub.com.
- Find the right repository.
- Click "Issues" -> "New Issue".
- Painstakingly write out the title, description, acceptance criteria, and dev notes from scratch.
- Add labels, assignees, and projects.
Every step was manual. It broke my focus and pulled me out of my development environment. The context switch was a killer for productivity.
Solution 2: My First Prompt and Its Pains
My first step into automation was to create a generic prompt for Copilot Chat. The idea was to generate the content of the PBI, which I could then copy and paste into GitHub.
My prompt looked something like this:
The Prompt
You are a Scrum Product Owner. Your task is to create a clear and concise PBI with sufficient information for developers to implement it.

The PBI should include the following:

Title: Create a PBI title. The title must start with 🐛 Bug - if it's a bug, or ✨ (just the emoji, no extra words) if it's a feature or change.
Description: Create a PBI description.
Acceptance Criteria: unordered list of the Acceptance Criteria.
Dev Notes: Any important implementation notes for the developer.
Reproduce Steps: If it's a bug, list the steps to reproduce it. If not, skip this section.

The acceptance criteria should always include:
- Meets [Definition of Done]({DEFINITION_OF_DONE_URL})

Tasks:
{TASKS}
While this was a step up from writing everything from scratch, it introduced its own set of problems. The biggest pain point was managing the prompt itself. I had to store it somewhere, find it, copy it, and then paste it into the chat. After generating the text, I still had to go through the whole manual GitHub issue creation dance. It was better, but still clunky and far from seamless.
And of course, I still hand to create the PBI in GitHub manually, which meant I was still switching contexts and losing focus. 😩
Let's see how we can automate the PBI creation with the next solution.
Solution 3: Automation with the GitHub MCP Server
This is where things started to get interesting. I discovered the GitHub MCP (Model Context Protocol) Server, a tool that allows an AI assistant to interact directly with GitHub. This meant I could not only generate the PBI content but also create the issue in one go.
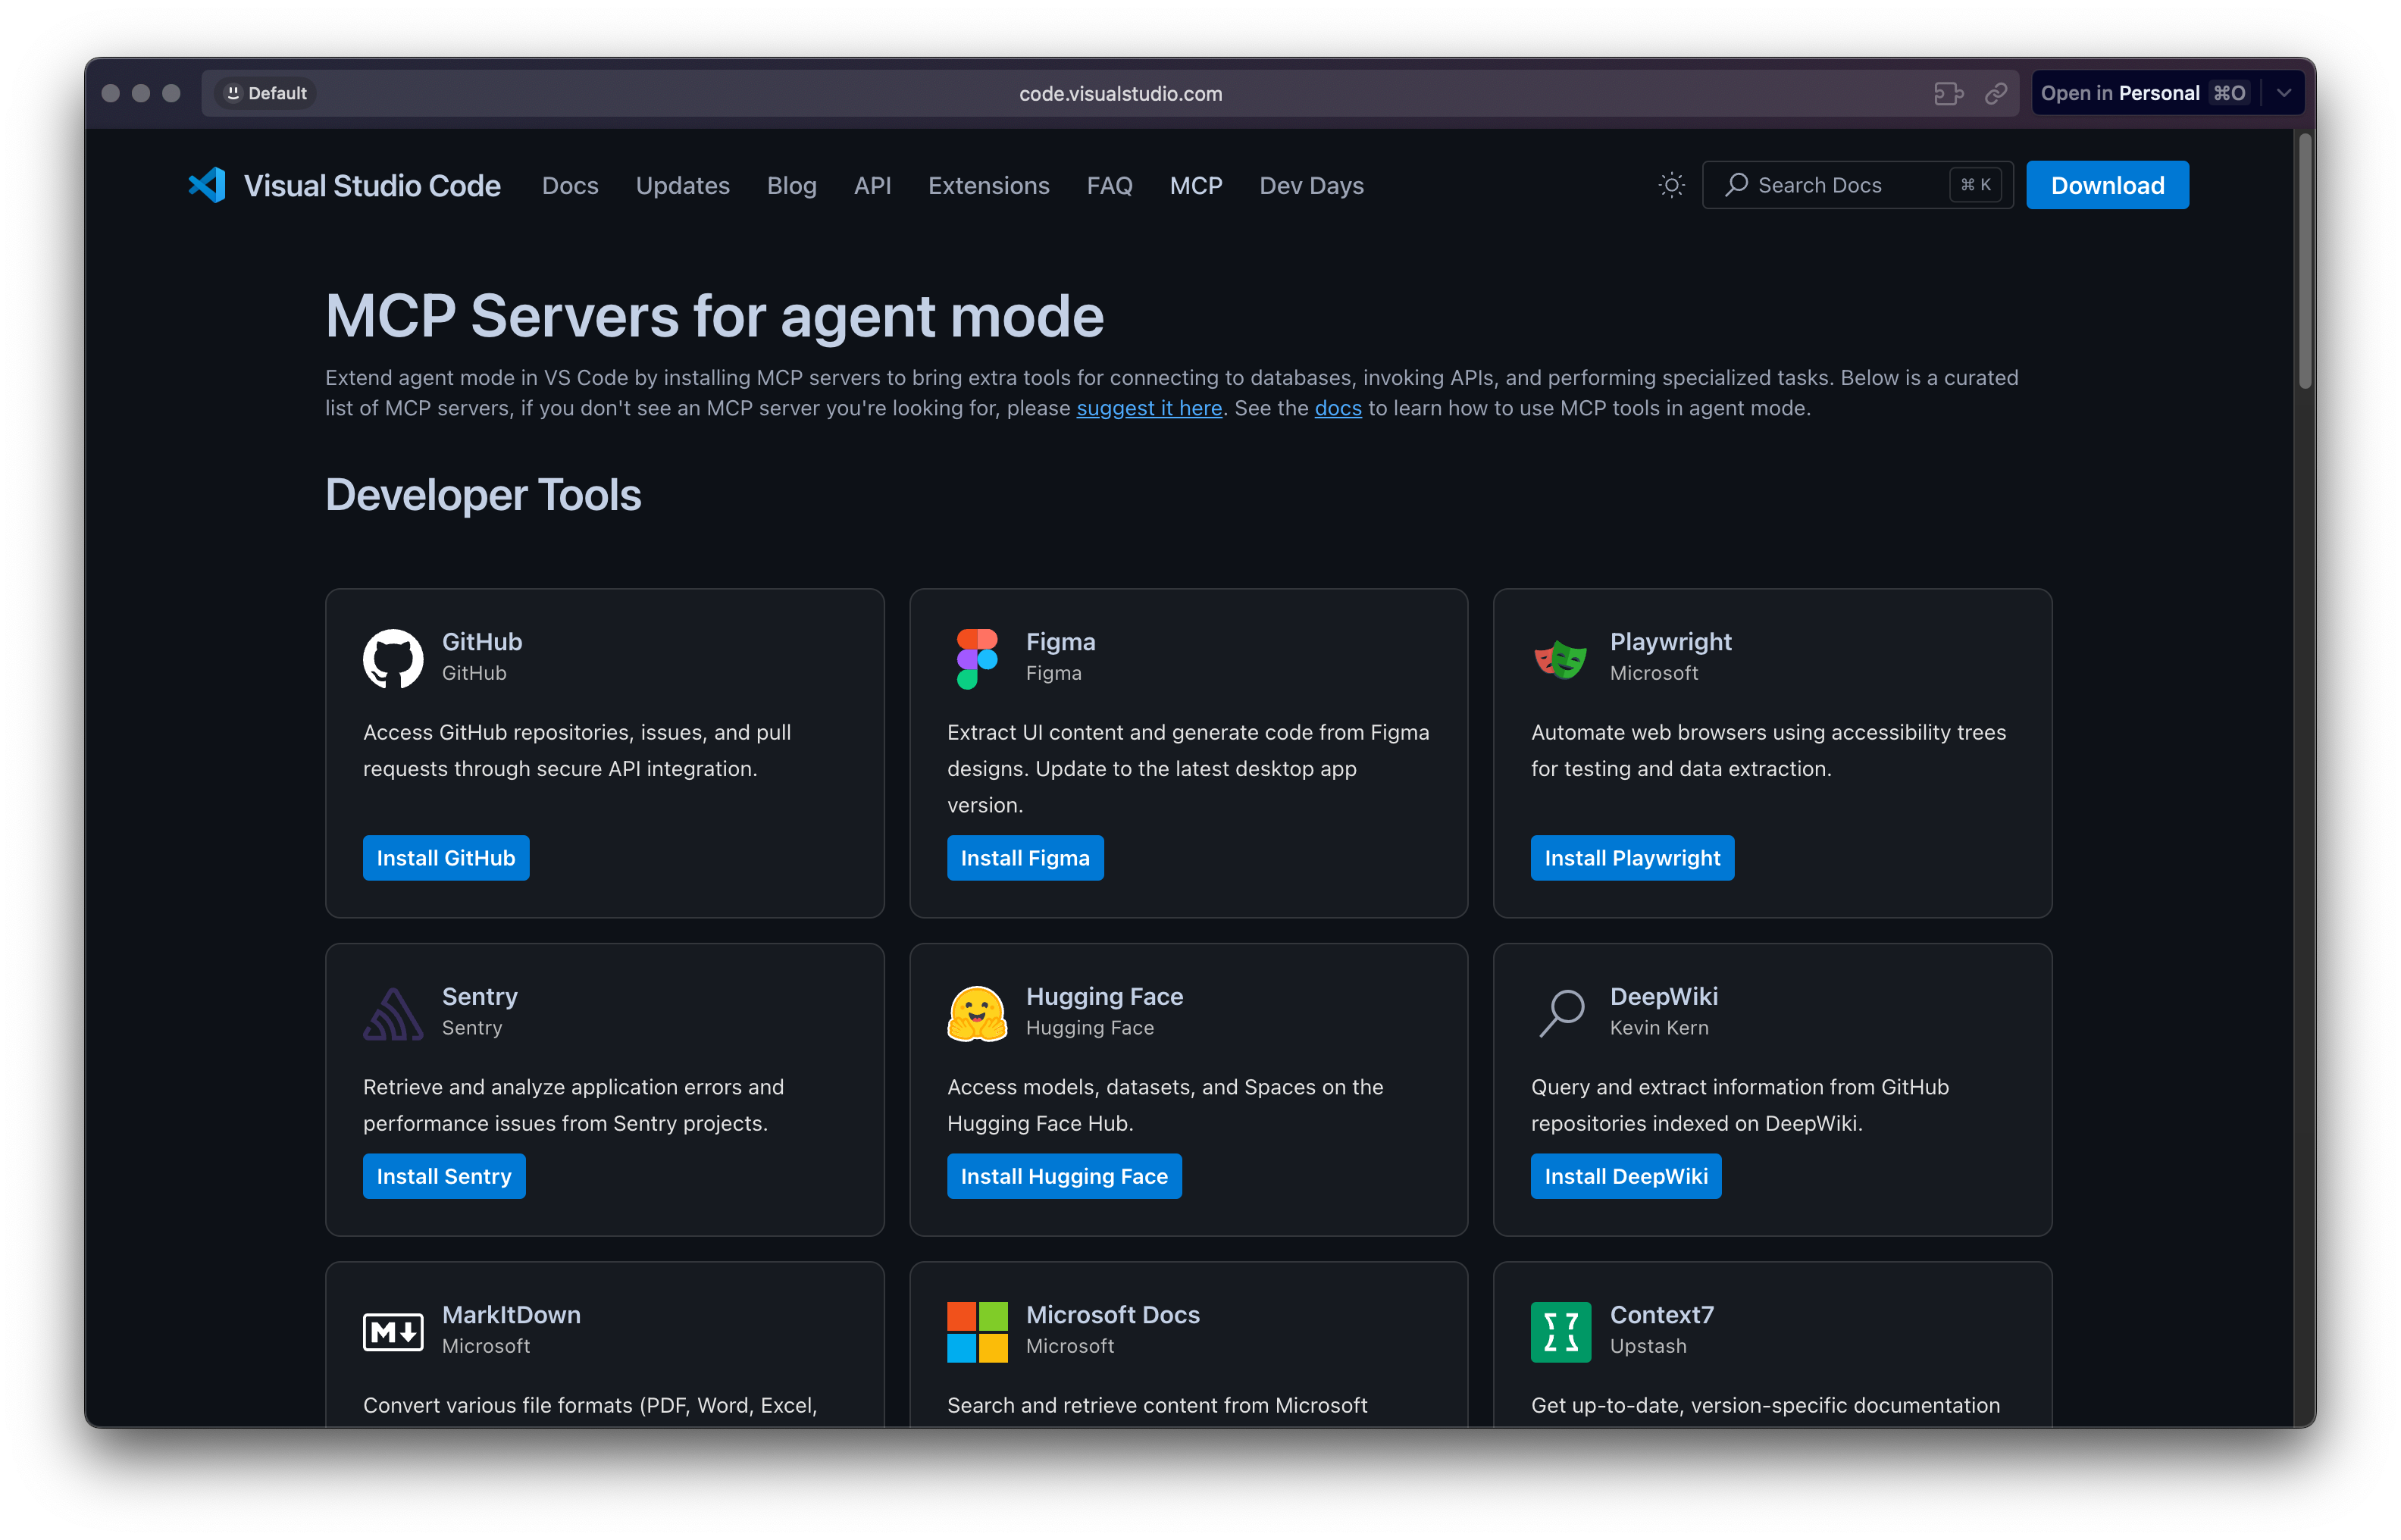
Installing GitHub MCP Server
The easiest way is to navigate to the new MCP Servers category in the extensions sidebar. Click on the globe which will take you to a currated list of MCP servers.
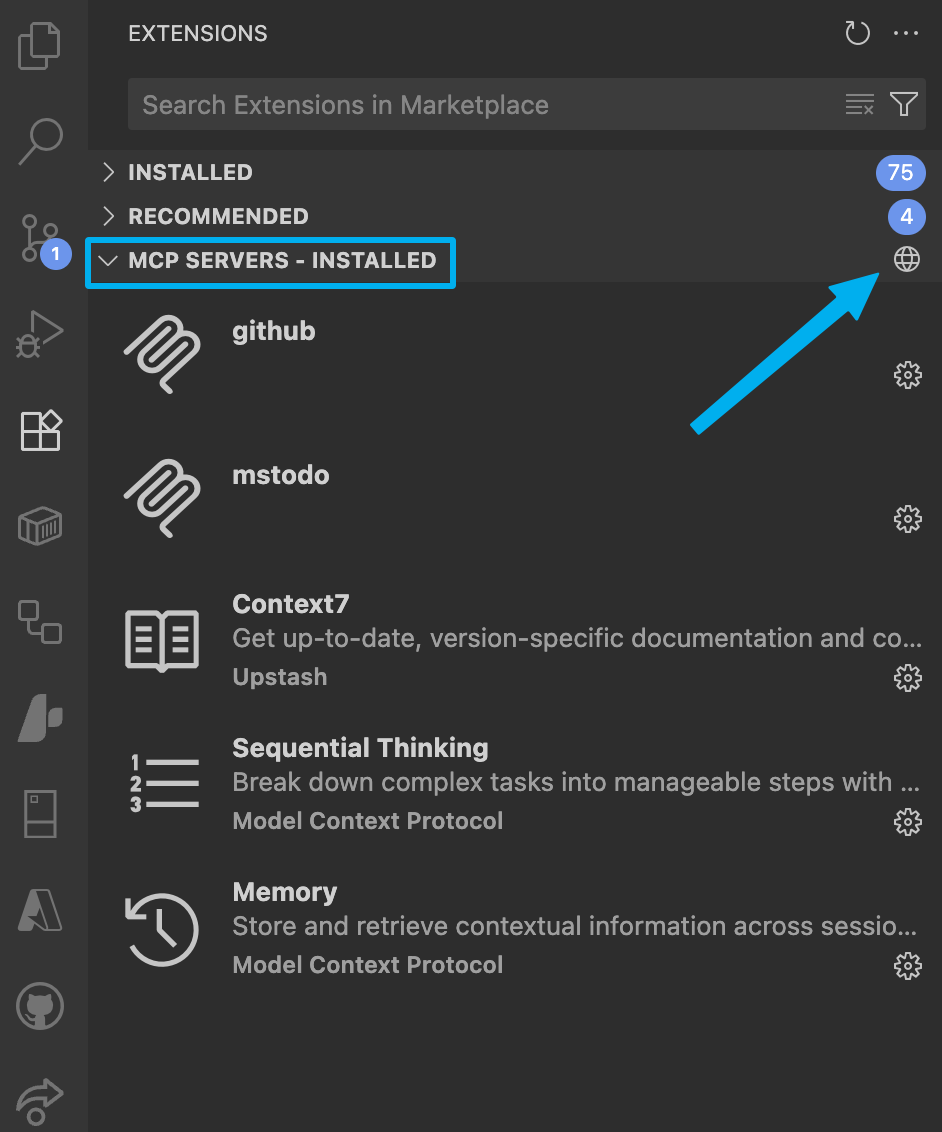
Find the GitHub MCP Server and install it.
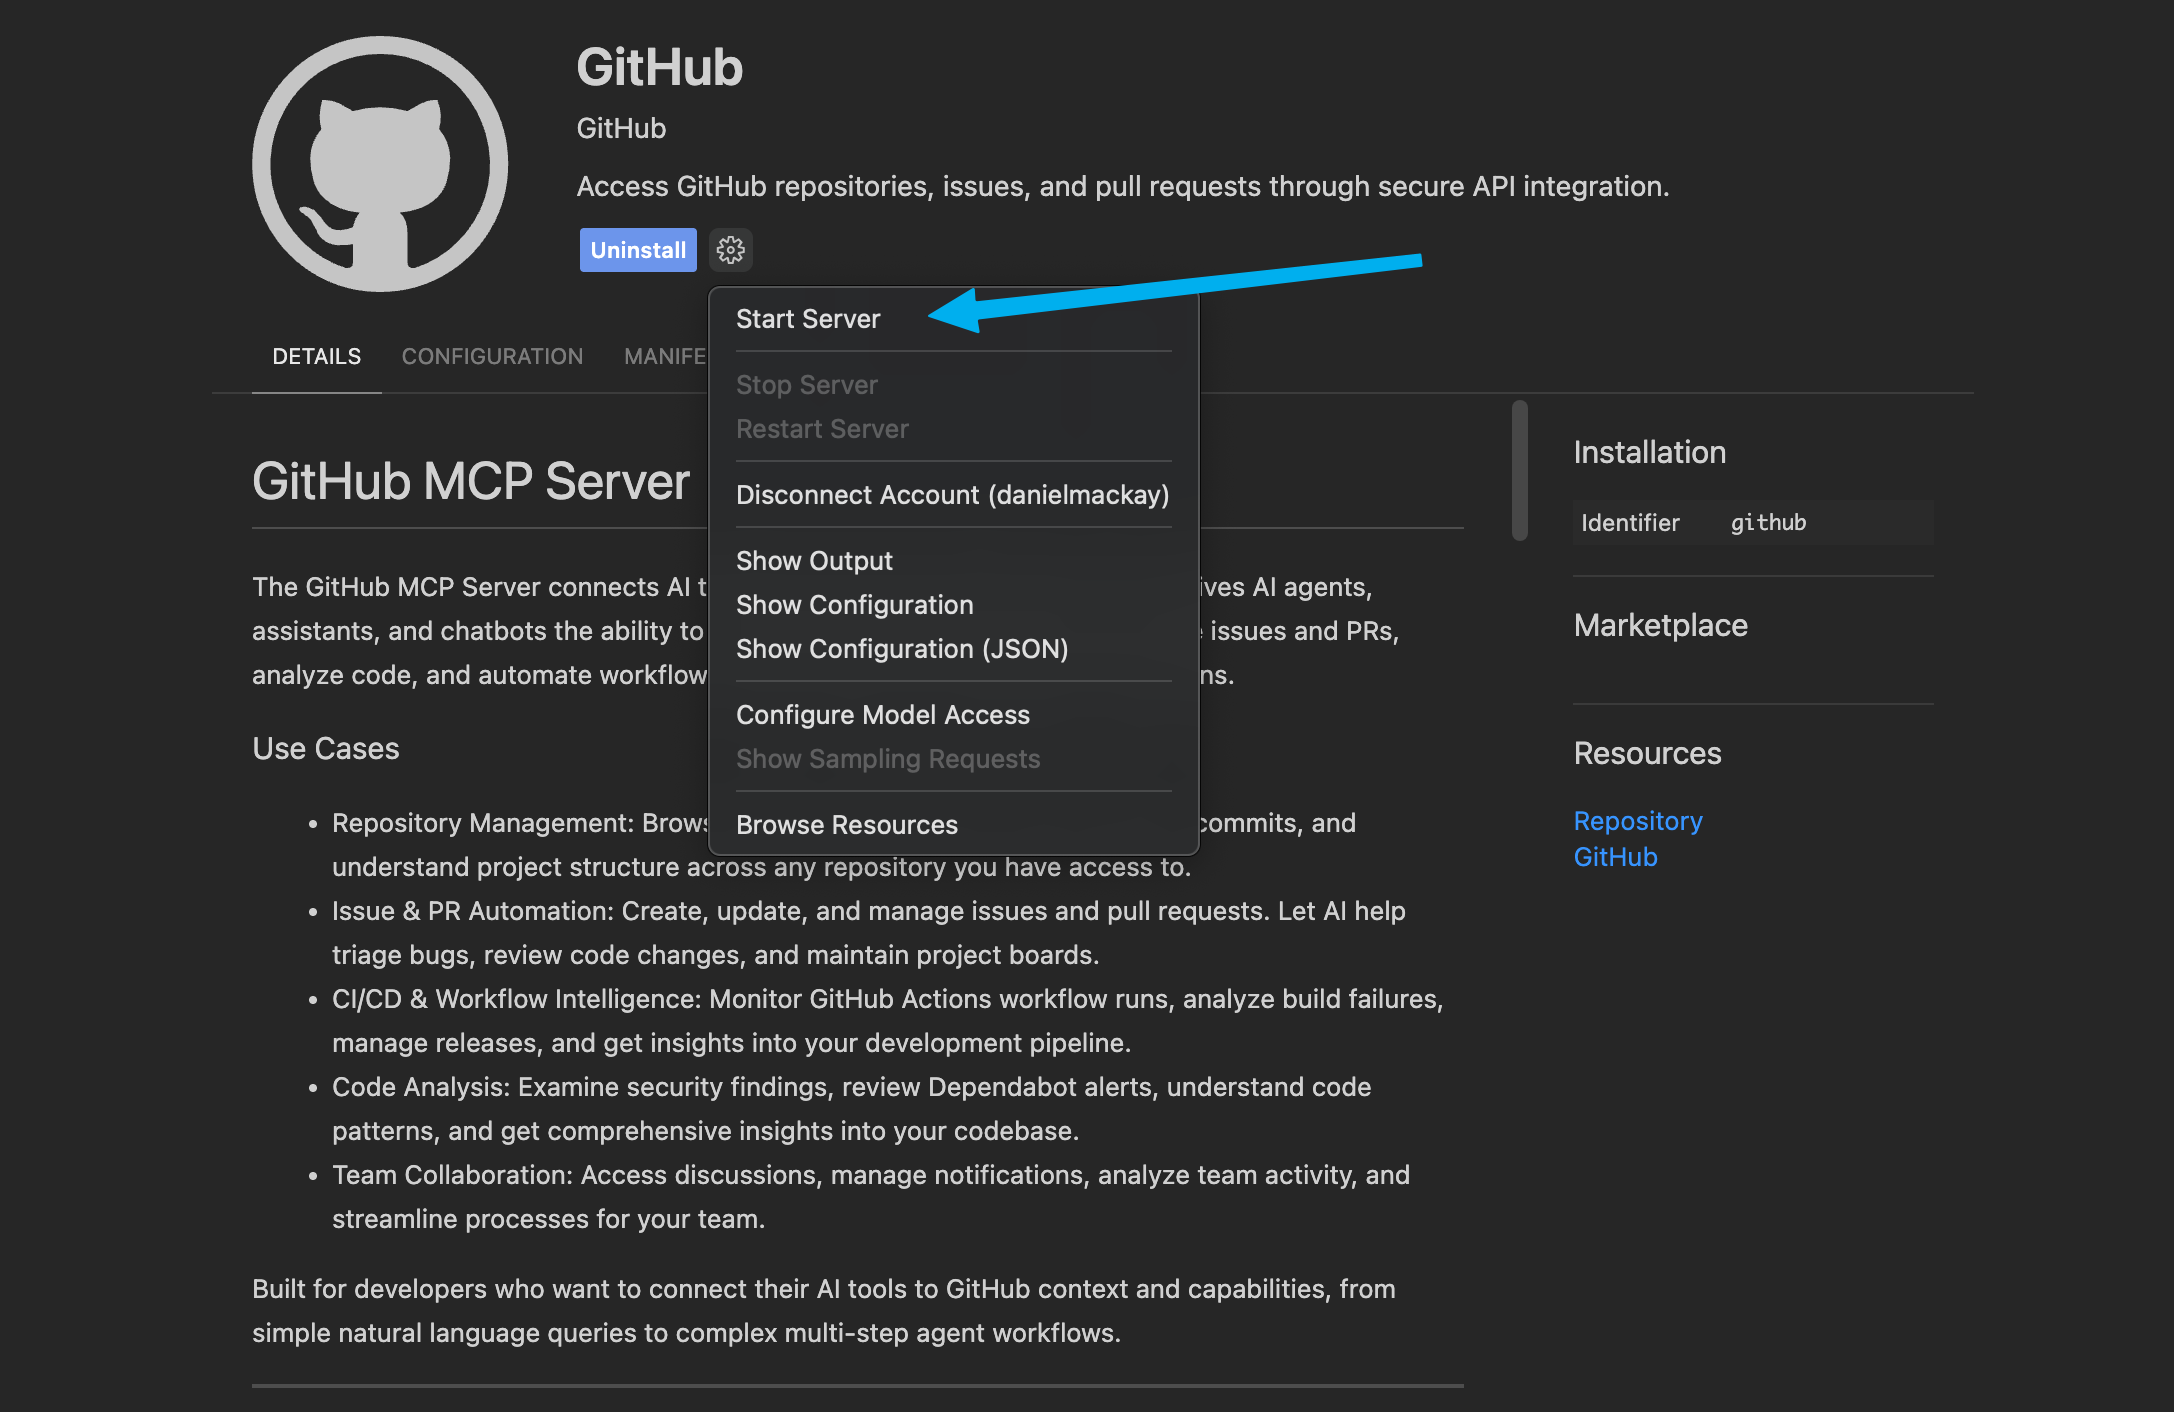
Next, ensure the server is started. This should prompt you to authenticate with GitHub. Follow the instructions to log in and authorize the server.
The Prompt
Now that we can create issues directly, we need to update our prompt to instruct copilot to do so.
Create an Issue in GitHub using the provided prompt.

Do not change any code.

The response should always be in markdown.

Title should be a H2 heading (e.g. ## Title). All other sections should be H3 headings (e.g. ### Description)

create this PBI in {REPO_NAME} repo in {ORG_NAME} organisation.

Add only a GitHub label of "{LABEL}"

Do not include the title in the Github Issue Description

Give me a short summary including the URL of the created PBI when finished
The full prompt now looks like this:
You are a Scrum Product Owner. Your task is to create a clear and concise PBI with sufficient information for developers to implement it.

Create an Issue in GitHub using the provided prompt.

Do not change any code.

The PBI should include the following:

Title: Create a PBI title. The title must start with 🐛 Bug - if it's a bug, or ✨ (just the emoji, no extra words) if it's a feature or change.
Description: Create a PBI description.
Acceptance Criteria: unordered list of the Acceptance Criteria.
Dev Notes: Any important implementation notes for the developer.
Reproduce Steps: If it's a bug, list the steps to reproduce it. If not, skip this section.

The acceptance criteria should always include:
- Meets [Definition of Done]({DEFINITION_OF_DONE_URL})

Tasks:
{TASKS}

The response should always be in markdown.

Title should be a H2 heading (e.g. ## Title). All other sections should be H3 headings (e.g. ### Description)

create this Issue in {REPO_NAME} repo in {ORG_NAME} organisation.

Add only a GitHub label of "{LABEL}"

Do not include the title in the Github Issue Description

Give me a short summary including the URL of the created PBI when finished
This was a significant leap forward. I could now generate a PBI and create the corresponding GitHub issue without leaving VS Code. The manual copy-paste into GitHub was gone! ✅
Solution 4: The Power of In-Repo Prompt Files
The main issue with my previous iteration was that my awesome prompt was still a free-floating piece of text I had to manage. The solution? GitHub Copilot's 'prompt files' feature. By storing the prompt in a file within the repository itself (e.g., in .github/prompts/create-pbi.md), I could easily reference it and make it specific to the project.
More importantly, I could make the prompt smarter by having it reference other context-rich files in the repo, like a definition-of-done.md or, even better, a copilot-instructions.md.
When you use GitHub Copilot locally within the context of a repository, it scans your codebase to understand your project. You can supercharge this process by creating a copilot-instructions.md file that summarizes all the critical information Copilot needs. You can even ask Copilot to generate a first draft of this file for you!
This was gives Copilot superpowers. My PBI generation was now context-aware and tailored to the specific project I was working in.
Creating the Prompt file
The easiest way to create the prompt file is to let VS Code guide you. Start by clicking 'Configure Chat' at the top of the Copilot Chat panel.
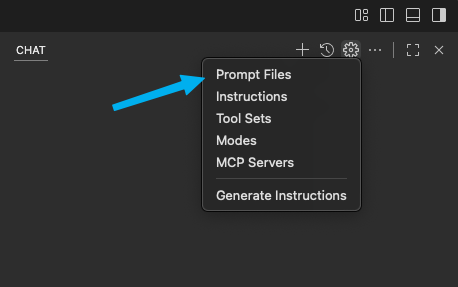
This will prompt you for a name for the new prompt file, and to choose a location for it (defaults to .github/prompts).
Besides the prompt there is several pieces of frontmatter that you can add to the file.
- mode: This is the mode in which the prompt will be used. For our use case, we want to set it to
agentso that Copilot can use tools. - model: This is the model that Copilot will use to generate the response. For our PBI creation, I prefer Gemini 2.5.
- tools: This is a list of tools that Copilot can use to complete the task. For our PBI creation, we want to include tools like
codebase,usages,fetch,findTestFiles,searchResults,githubRepo,search,create_issue, andget_issue. - description: This is a brief description of what the prompt does. For our PBI creation, we can set it to something like "Create a PBI in GitHub using the provided prompt".
VS Code will open the new prompt file in the editor, and you can paste in your prompt. Save the file, and you're ready to go!
The complete prompt with frontmatter and project specific details now looks like this:
---
mode: agent
model: Gemini 2.5 Pro (Preview)
tools: ['codebase', 'usages', 'vscodeAPI', 'think', 'problems', 'changes', 'testFailure', 'terminalSelection', 'terminalLastCommand', 'openSimpleBrowser', 'fetch', 'findTestFiles', 'searchResults', 'githubRepo', 'extensions', 'runTests', 'editFiles', 'runNotebooks', 'search', 'new', 'runCommands', 'runTasks', 'github']
description: Create a PBI in GitHub using the provided prompt
---

You are a Scrum Product Owner. Your task is to create a clear and concise PBI with sufficient information for developers to implement it.

Create an Issue in GitHub using the provided prompt.

Do not change any code.

The PBI should include the following:

Title: Create a PBI title. The title must start with 🐛 Bug - if it's a bug, or ✨ (just the emoji, no extra words) if it's a feature or change.
Description: Create a PBI description.
Acceptance Criteria: unordered list of the Acceptance Criteria.
Dev Notes: Any important implementation notes for the developer.
Reproduce Steps: If it's a bug, list the steps to reproduce it. If not, skip this section.

The acceptance criteria should always include:
- Meets [Definition of Done](./docs/definition-of-done.md)

The response should always be in markdown.

Title should be a H2 heading (e.g. ## Title). All other sections should be H3 headings (e.g. ### Description)

create this PBI in Northwind repo in SSW organisation.

Add only a GitHub label of "Needs Refinement"

Do not include the title in the Github Issue Description

Give me a short summary including the URL of the created PBI when finished

When generating the PBI, reference the [copilot-instructions.md](../copilot-instructions.md) for any additional information you may need about the project.

Ask any questions you need to clarify the requirements before creating the PBI.
Using Prompts
Now that we have our prompt file set up, we can use it directly in Copilot Chat. When you start a new chat, you can select the prompt file you created, and Copilot will use it to generate the PBI.
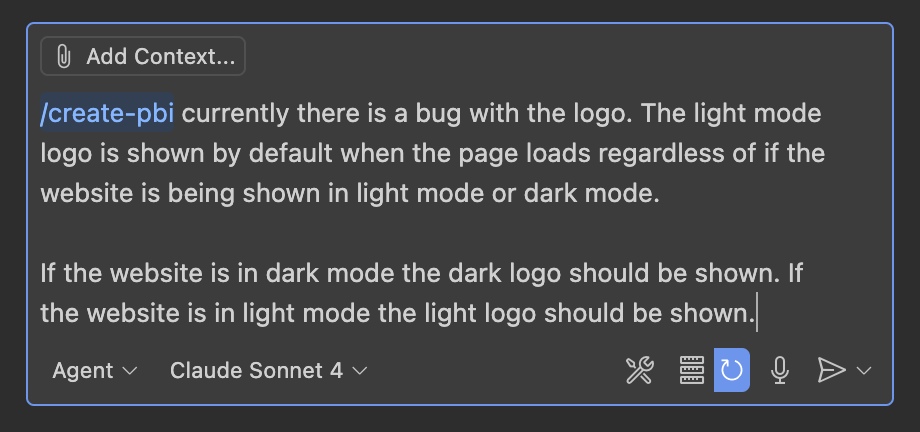
There are several ways to use this. You can using the VS Code command palette and select Chat: Run Prompt.... You can drag the prompt file into the chat panel. I prefer to use slash commands like /create-pbi directly in the chat panel.
The following PBI was created:
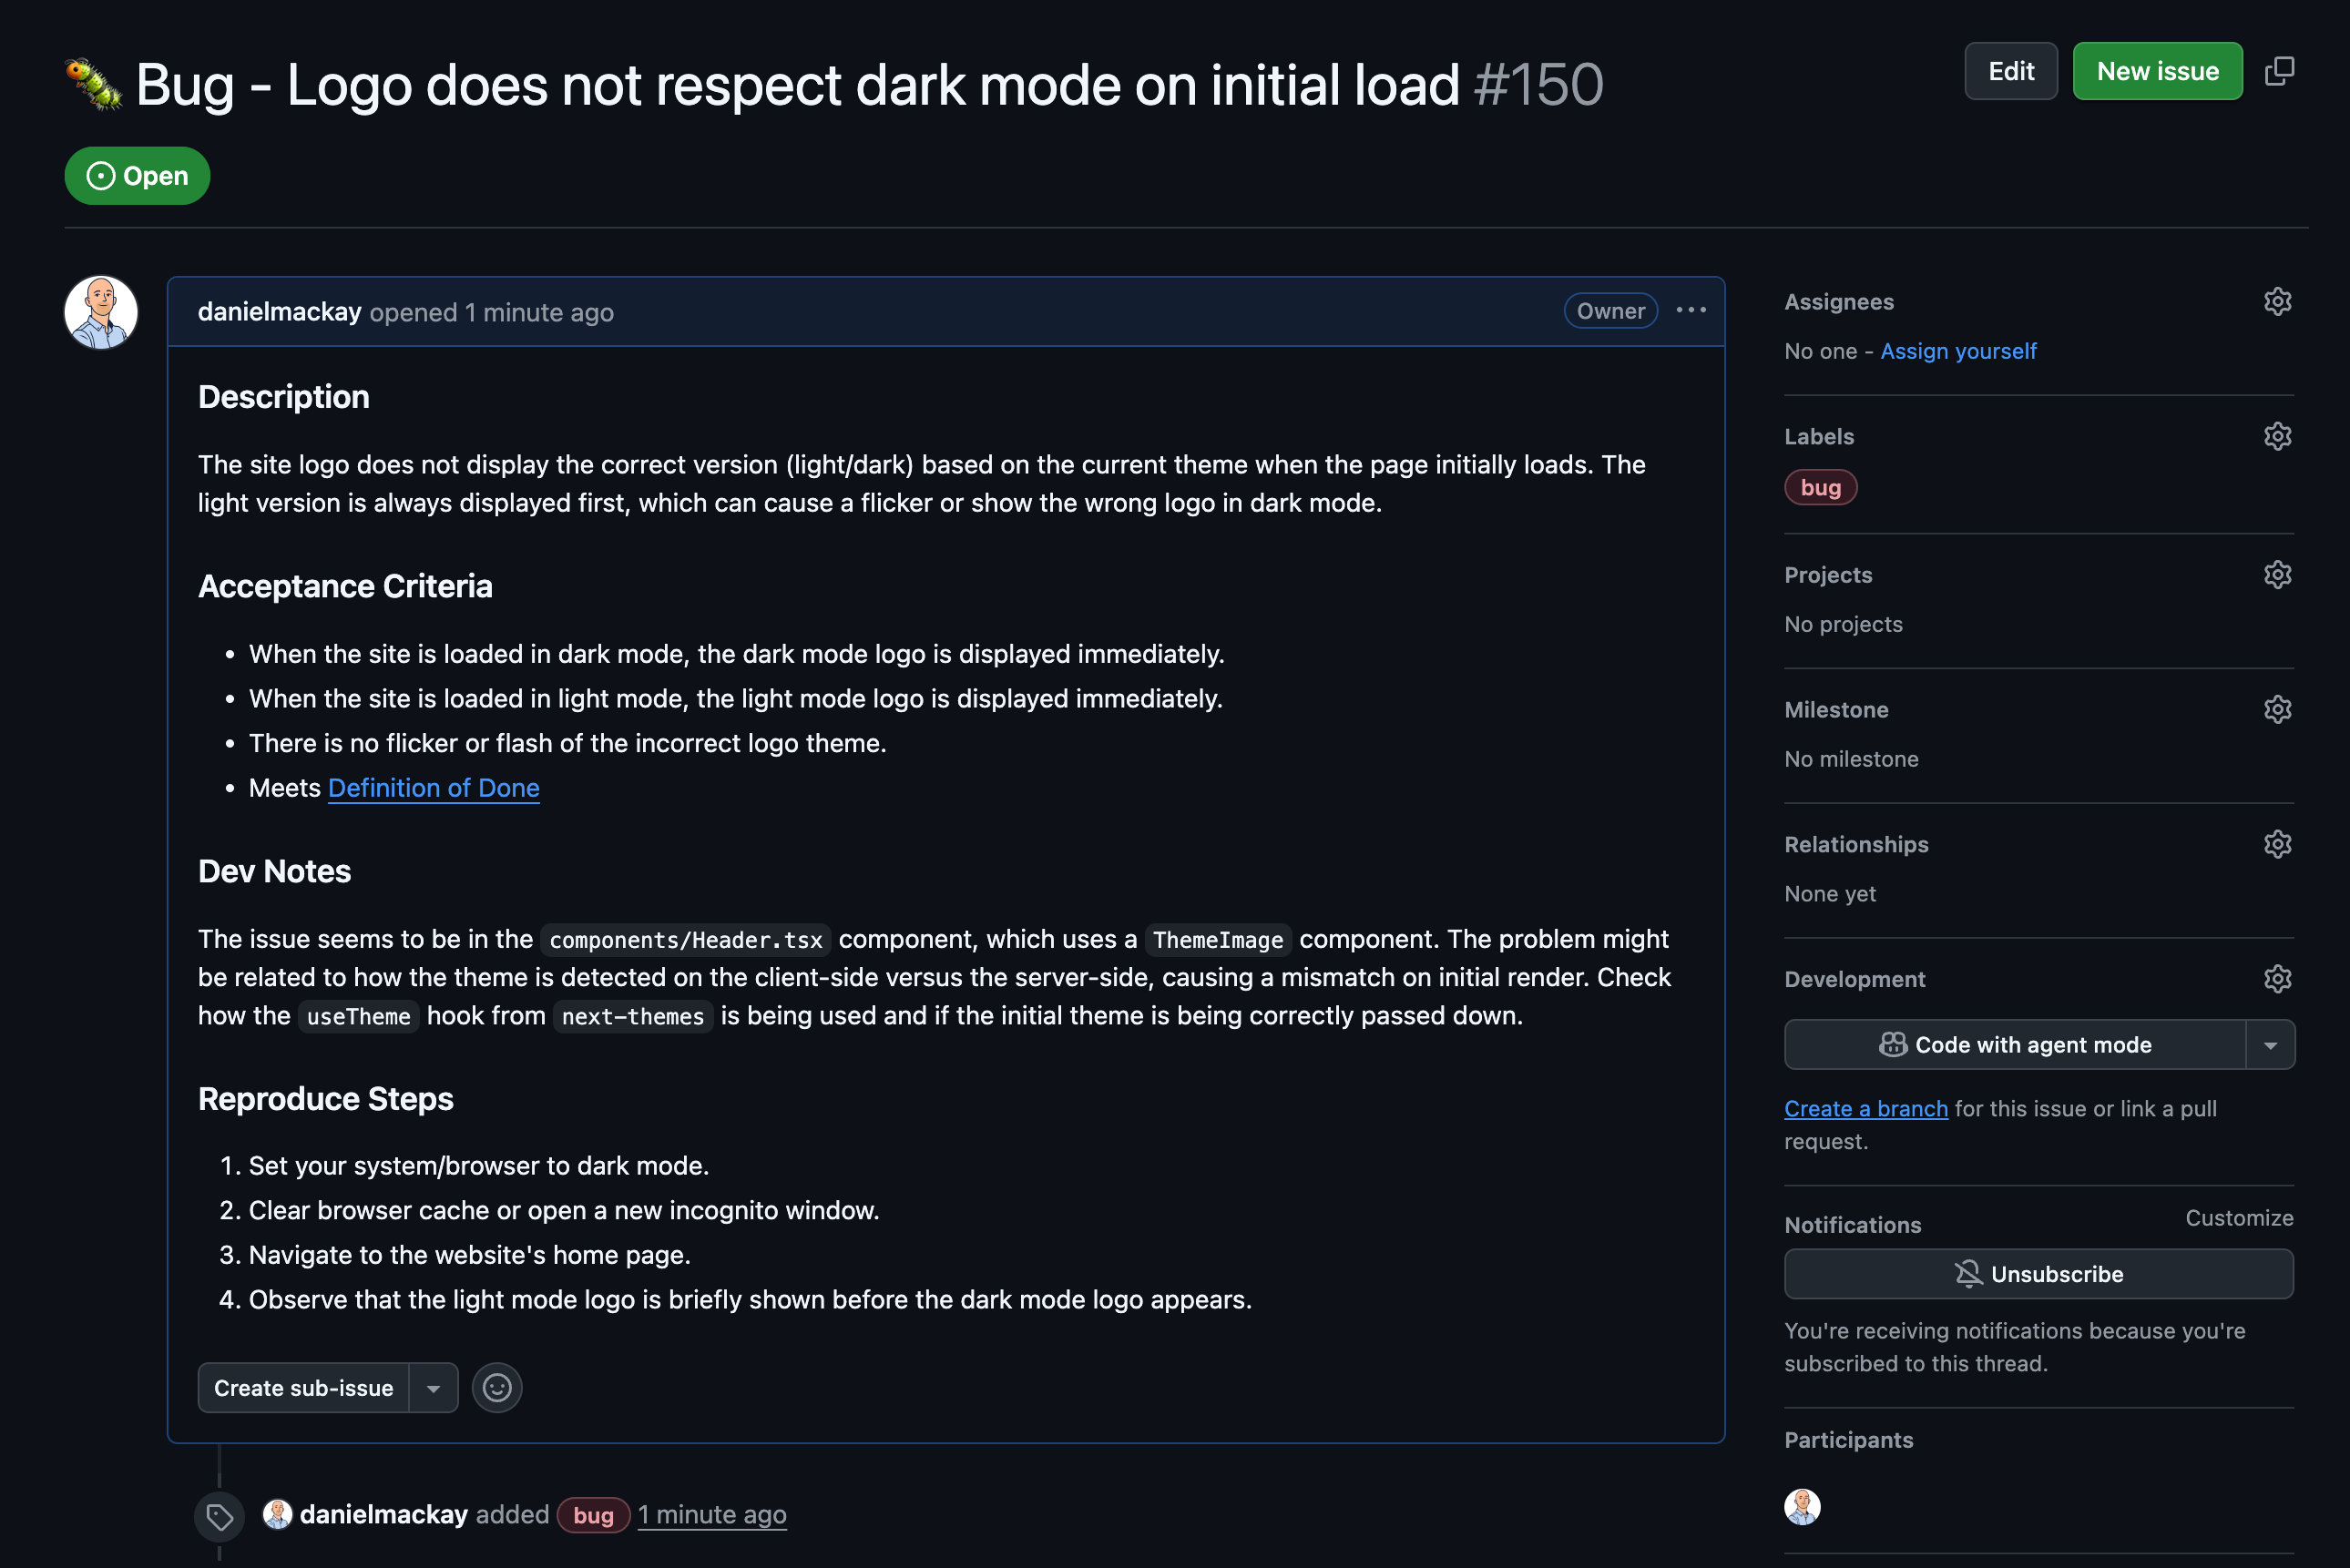
Figure: PBI created in GitHub
The "Aha!" Moment: Context + Conversation
The final tweak to my prompt was powerful, but the true "Aha!" moment came when I combined it with the power of VS Code's integrated environment. The prompt now included this line:
Ask any questions you need to clarify the requirements before creating the PBI.
This was just one part of the puzzle. The real magic happens because I'm running Copilot directly within my project in VS Code. This gives it a massive advantage: it has access to the entire context of my codebase. It can read my copilot-instructions.md, understand my application's architecture from the code itself, and see how different components interact.
This combination is the ultimate PBI superpower! 🦸♂️.
Between Copilot now having access to relevant knowledge about the project, and being able to ask questions to fill in gaps in the original requirements, I've found Copilot generating surprisingly high quality PBIs every time. It's not just automation; it's a true, context-aware partnership. 🙌
Bonus Round: What About Video?
My journey has been all about perfecting a text-based workflow, which, as a developer, fits me like a glove. But I've worked with enough Product Owners to know that sometimes, talking and showing is way faster than typing. Explaining a tricky UI bug or a complex user flow can be a pain to write out.
If that sounds like you, and you'd rather create PBIs using your voice or a quick screen recording, then you should definitely check out a tool I've been impressed by called YakShaver. It's brilliant for logging bugs because you can just record your screen and talk through the steps. It even helps figure out which repository the issue belongs to, which is a neat trick. For those who live less in the code and more in the product, it could be a real workflow-saver.
Summary
My quest to optimize PBI creation took me on a journey from tedious manual work to a sophisticated, conversational workflow. By leveraging GitHub Copilot, the MCP Server, and in-repo prompt files, I've eliminated context switching and created a system that's not only faster but also produces higher-quality results. The final step of enabling a clarifying conversation with Copilot was the key that unlocked its full potential, turning it from a simple code generator into a true development assistant. 🤖
This is the beginning. If you want to see how to build on this to create a full AI-powered development workflow, see my colleague Gordon Beeming's post on mastering GitHub Copilot.
Resources
- GitHub MCP Server: Learn more about how to interact with GitHub via an MCP server.
- GitHub Copilot: Official Website
- Mastering GitHub Copilot: A guide to mastering GitHub Copilot on GitHub.com
- YakShaver: Record and report bugs with ease
- Copilot Prompt Files: Official documentation for prompt files
- GitHub Copilot DevOps Excellence: Prompt Files vs Instructions vs Chat Modes - A comprehensive comparison